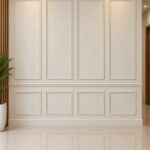
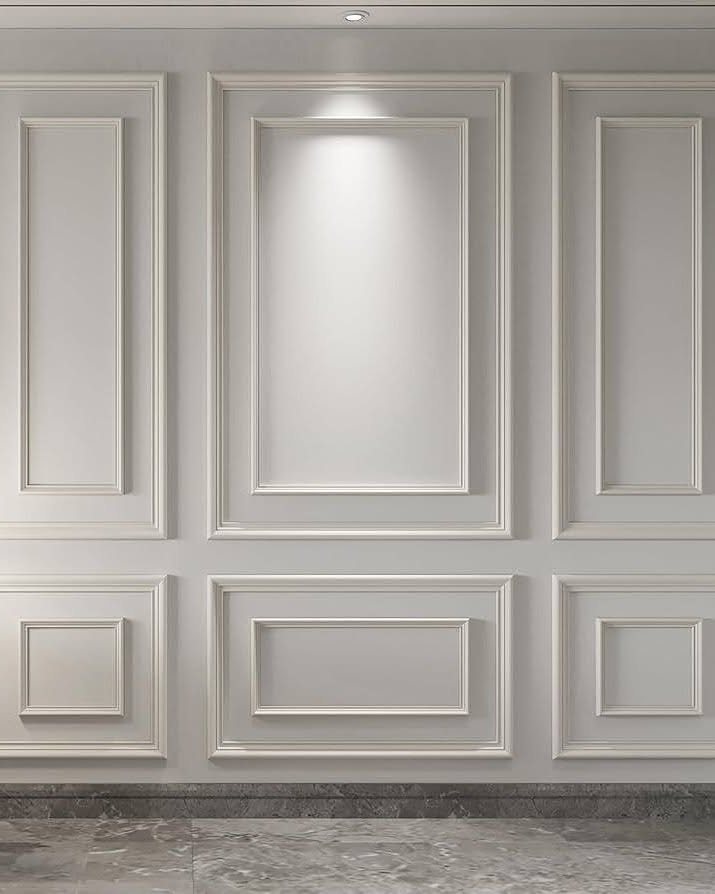
These 11 ideas start with a single Saturday, stock trim, and a nail gun, then stretch to layered panels, color, and the kind of detail work that reads historic without the century-old wait.
I draw every layout in painter’s tape and live with the outline for 2 days before a saw touches wood.
1. Traditional Ornate Picture Frame Molding
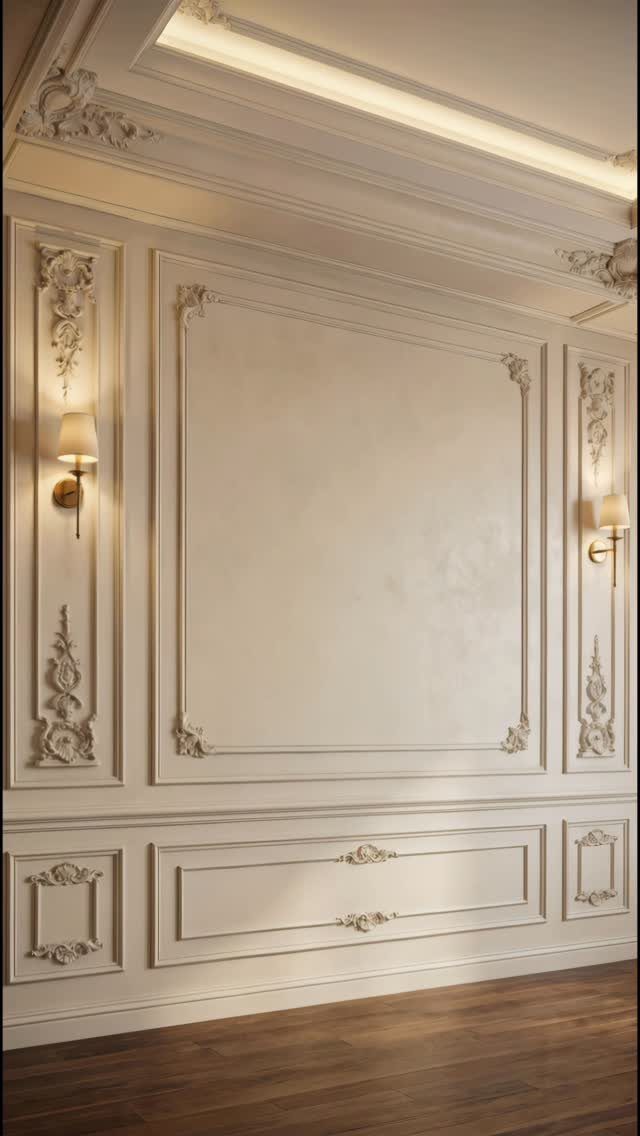
Ornate picture frame molding carries the DNA of 17th century baroque palaces into a modern dining room or hallway. The relief carvings at each corner catch light from a sconce in ways flat trim never will.
This style asks for patience and a miter saw that cuts true. I would not attempt it without one, since the corners must mate cleanly or the whole wall reads as sloppy.
Paint the molding before installation; touch-up after caulking hides the nail holes but never the seams between pieces.
A coffered ceiling is a separate weekend. Do the molding first and live with it.
The ceiling can wait a year.

Wall Molding Kit: The package includes 24 pcs wall molding (24in-14 pcs, 54in-6 pcs, 48in-4 pcs), which can be combined into 6 frames, allowing you to easily create a stylish accent wall. The 6-frame layout shown is designed for a wall measuring approximately 10 feet high by 11 feet wide. Please measure your wall and plan the layout before installation.

DIY Wall Panel Set: Wall molding kit includes 3 sets of pre-cut flexible wall decorations, each set has 8 pcs, total 24 pcs, can mix and match our different sizes to beautify your walls. Additionally, easily paint the trims in your favorite color(black,gold,blue,pink,green) to match any interior style-modern, farmhouse, vintage
2. Picture Frame Wall Molding Ideas
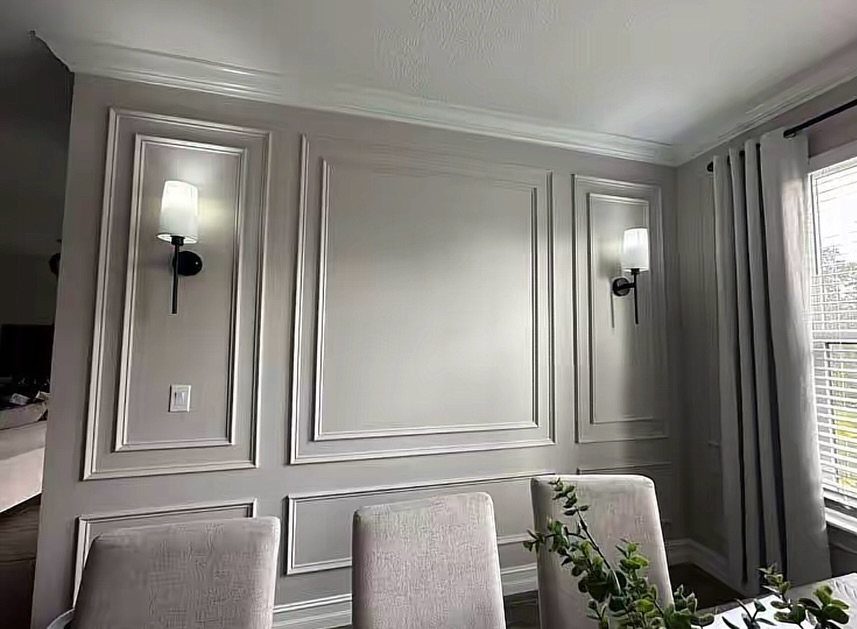
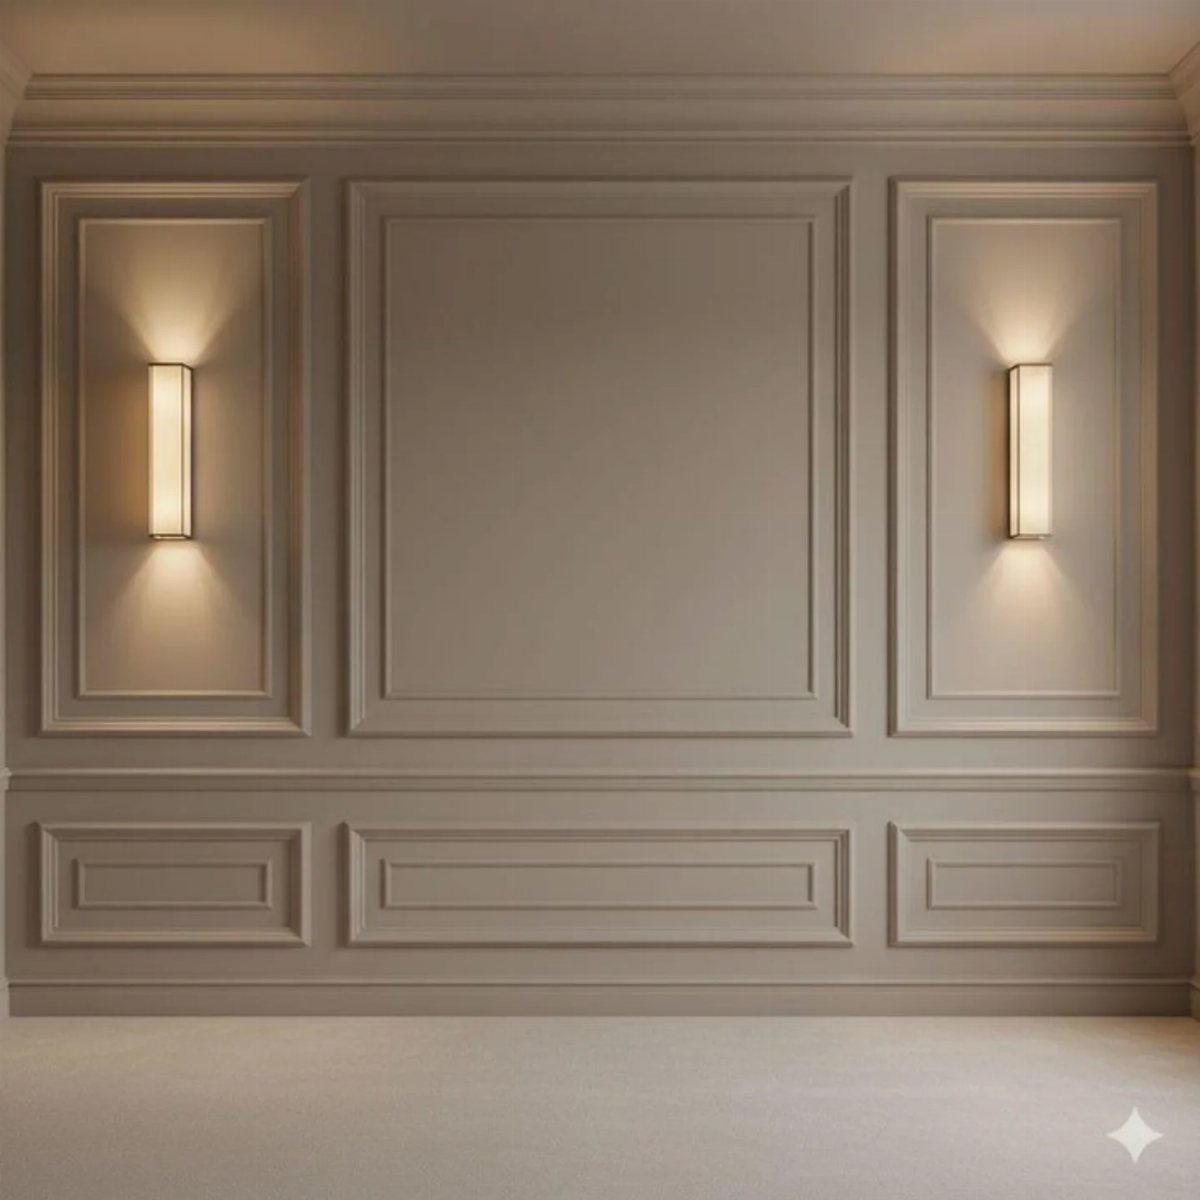
Three rectangular panels of equal width make this taupe wall feel built in rather than decorated on. The sconces sit inside the outer frames, which turns the molding into architecture that happens to hold light fixtures.
For sizing, I measure the wall, subtract the width of all vertical pieces, and divide the remainder by 3. I draw it in painter’s tape first and live with the outline for 2 days.
Grey reads as color without shouting. If your room already has a bold rug or art, this is the safer path.

Museum-grade Quality Rustic Canvas Frame: Elevate your artwork with FOLKOR classic art frame, a perfect blend of classic elegance and modern sophistication. This traditional art frame features subtle textures and tones, with 2.95" face wide, creating a gorgeous visual effect and adding depth your walls. [Note: Empty frame only, no glass cover and backing board]

European Style Picture Frame Pattern: The wallpaper features a design of european style picture frame, which can be seamlessly spliced during installation. This ensures precise pattern alignment without material waste. This elegant decoration adds a touch of daily ritual and aesthetic pleasure to your living space

【Classic Vintage 5x7 Champagne Gold Picture Frame】 This 5x7 vintage picture frame features an elegant European-inspired Baroque-style design finished in a soft champagne gold tone. The sculpted contours, curved edges, and refined proportions create a timeless antique gold picture frame look that brings classic luxury and old-world charm to any space.
3. Picture Frame Molding on Walls
Installing picture frame molding is a Saturday project that stretches to Sunday if you rush the layout.
The sequence matters: find the studs, mark a level baseline, cut one complete frame dry-fit to the wall, then commit with adhesive and nails.
I use stock trim in longer lengths, which means fewer joints than shorter stock. A cordless nail gun saves your hands and your marriage; hammering this much trim tests both.
Caulk every seam, and baby wipes smooth the bead cleaner than a finger ever will.
Paint the wall first. Cutting in around installed molding is misery.

Classic Design, Warm Illumination Inspired by museum‑grade lighting fixtures, this picture frame light features a durable iron body with a fine copper‑plated finish that beautifully mimics the look of solid brass while offering superior cost‑effectiveness. It delivers clear, warm light without flicker or instability—unlike cheap strip lights—so your artwork’s true colors and details are faithfully revealed.
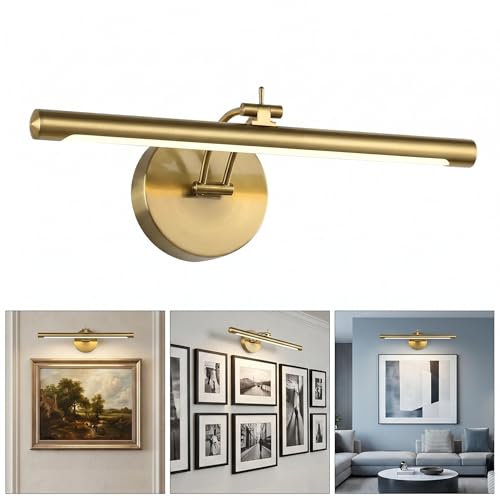
Dimmable Flicker-Free: Easy to adjust the brightness level of the accent lighting as you wish.This picture lights for wall is with ETL certificated dimmable driver ensure the sconces wall lighting to 5%-99% dimming range, The light for pictures on wall comes with 300 Lumen super bright room decor lighting.

♻️【Rechargeable & Dual-Control】Narotood picture lights come with rechargeable lithium batteries that save 80% compared to disposable batteries, making them more environmentally friendly. Featuring convenient remote/touch dual control, these lights use an optical light guide panel to provide 120-lumen, 120° glare-free illumination.
4. Using a Nail Gun for Installation
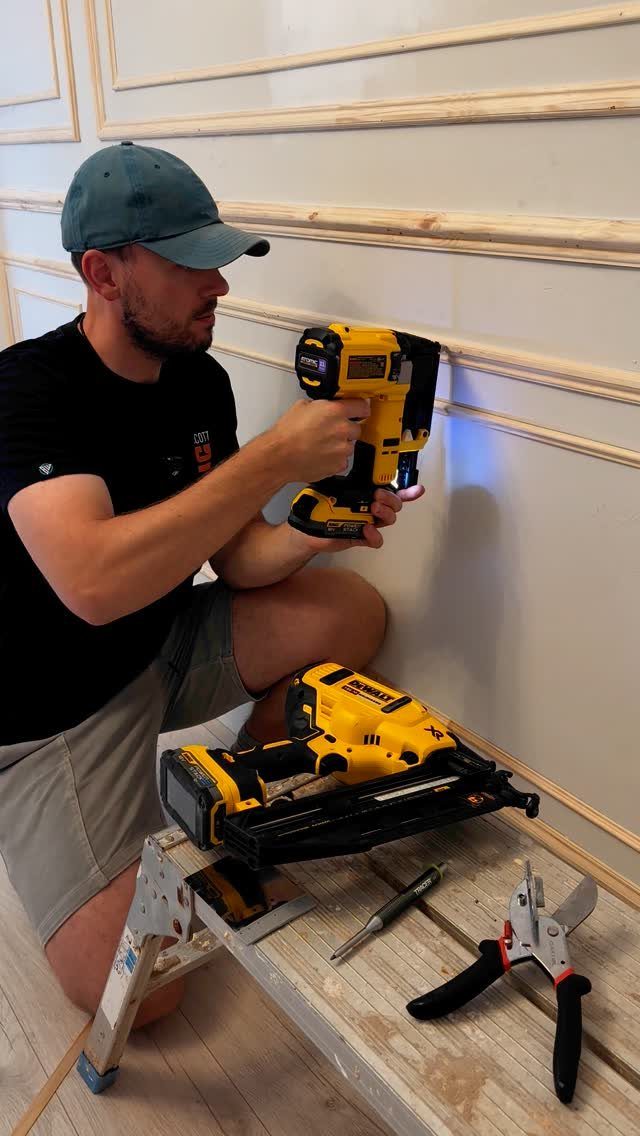
A yellow DeWalt cordless nail gun against thin wall trim is the tool pairing I would recommend to anyone doing this alone.
The gun lets you hold the piece in place with one hand and fasten with the other; no helper, no arguments, no slippage between positioning and nailing.
I run 18-gauge brads long enough to bite into stud or settle firmly in drywall with adhesive behind. A battery-powered gun handles a full wall of frames on one charge.
Keep a wood block cut to your panel width as a quick spacer, or the spacing drifts by the fourth rectangle.
Mitered corners split if you nail too close to the point. Stay back 2 inches.

100% battery powered. Eliminates the hassle of using gas, compressor, and hose

METABO HPT BRAD NAILER: The 18-Gauge Brad Nailer from Metabo HPT is ideal for trim work, furniture building and other finishing applications requiring precision and performance for both professionals and DIY enthusiasts alike.

This cordless finish nailer is 100% battery power eliminates need for a compressor, hose or costly gas cartridges
5. Sage Green Picture Moulding Walls
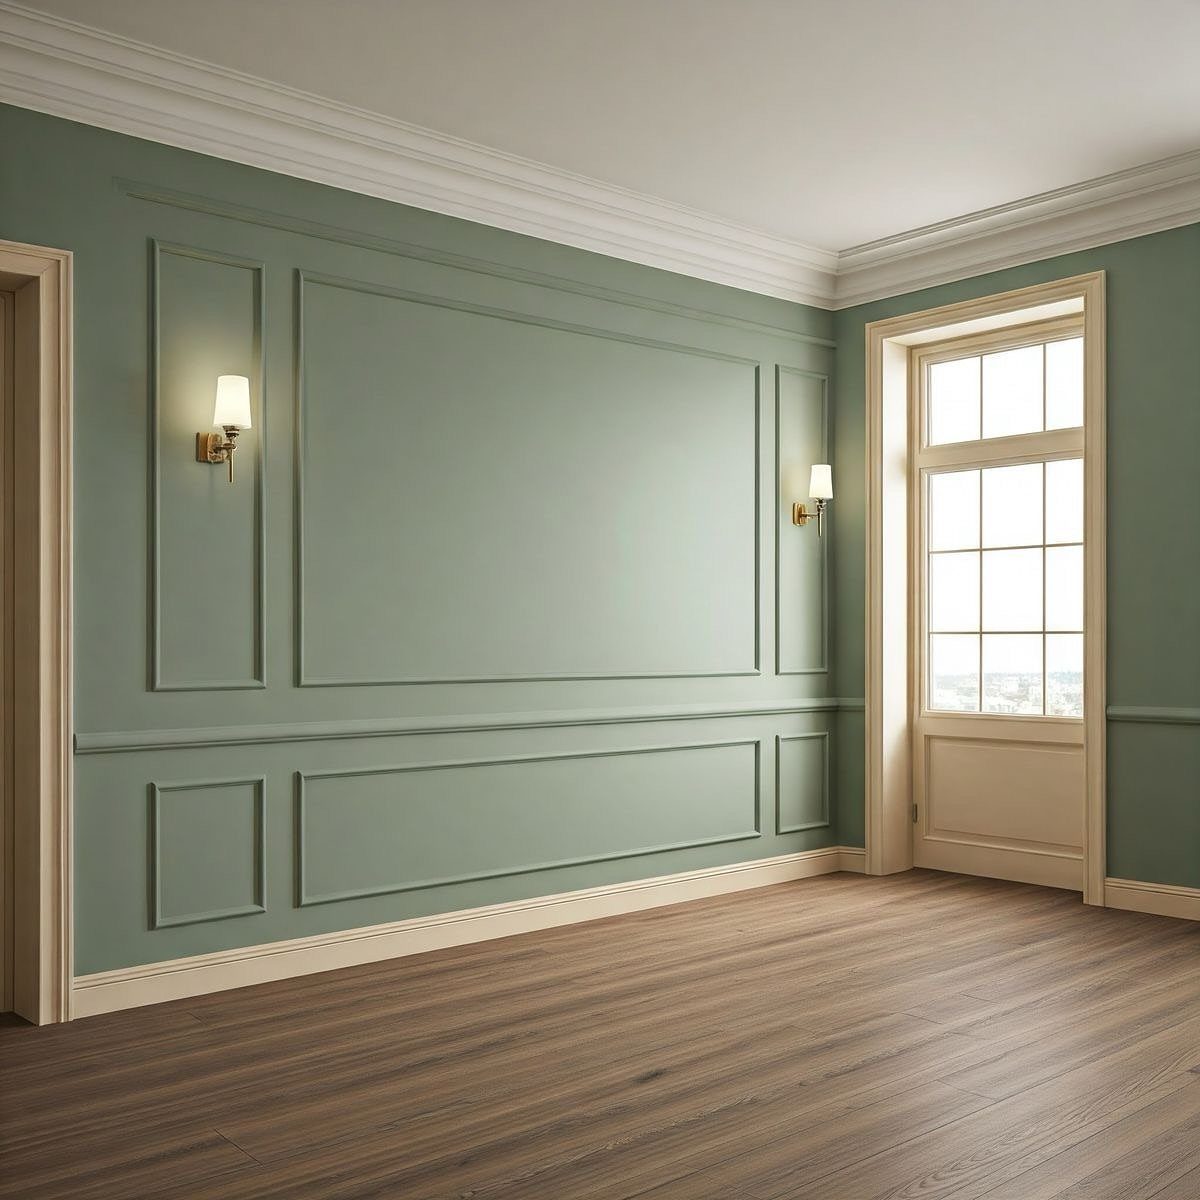
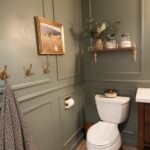
Sage green with white trim is a combination that reads vintage without trying hard. The color has enough grey in it that the wall recedes while the molding advances, which is the effect you want.
I would test this paint in morning and afternoon light before committing. Sage shifts warm or cool depending on exposure, and the wrong cast makes white trim look dirty.
Match your chair rail and crown paint exactly, even if the ceiling is a different shade.
This suits rooms with good natural light. In a basement or north-facing space, the green can turn muddy.
Choose a lighter value of the same color, or switch to the grey from entry 2.

BLUE PAINTER'S TAPE: Includes One 1.88 in x 60 yd roll of ScotchBlue Original Painter's Tape, a blue masking tape for painting that helps protect surfaces by preventing paint bleed

MULTI-SURFACE TAPE: This blue tape is ideal for a variety of surfaces including painted walls, trim, glass, wood and metal
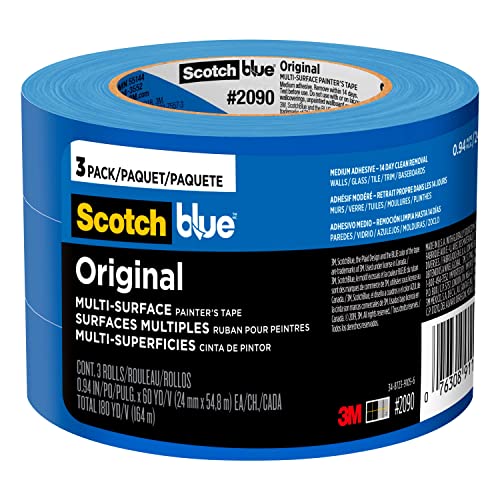
BLUE PAINTER'S TAPE: Includes Three 0.94 in x 60 yd rolls of ScotchBlue Original Painter's Tape, a blue masking tape for painting that helps protect surfaces by preventing paint bleed
6. Framing Wall Murals with Moulding
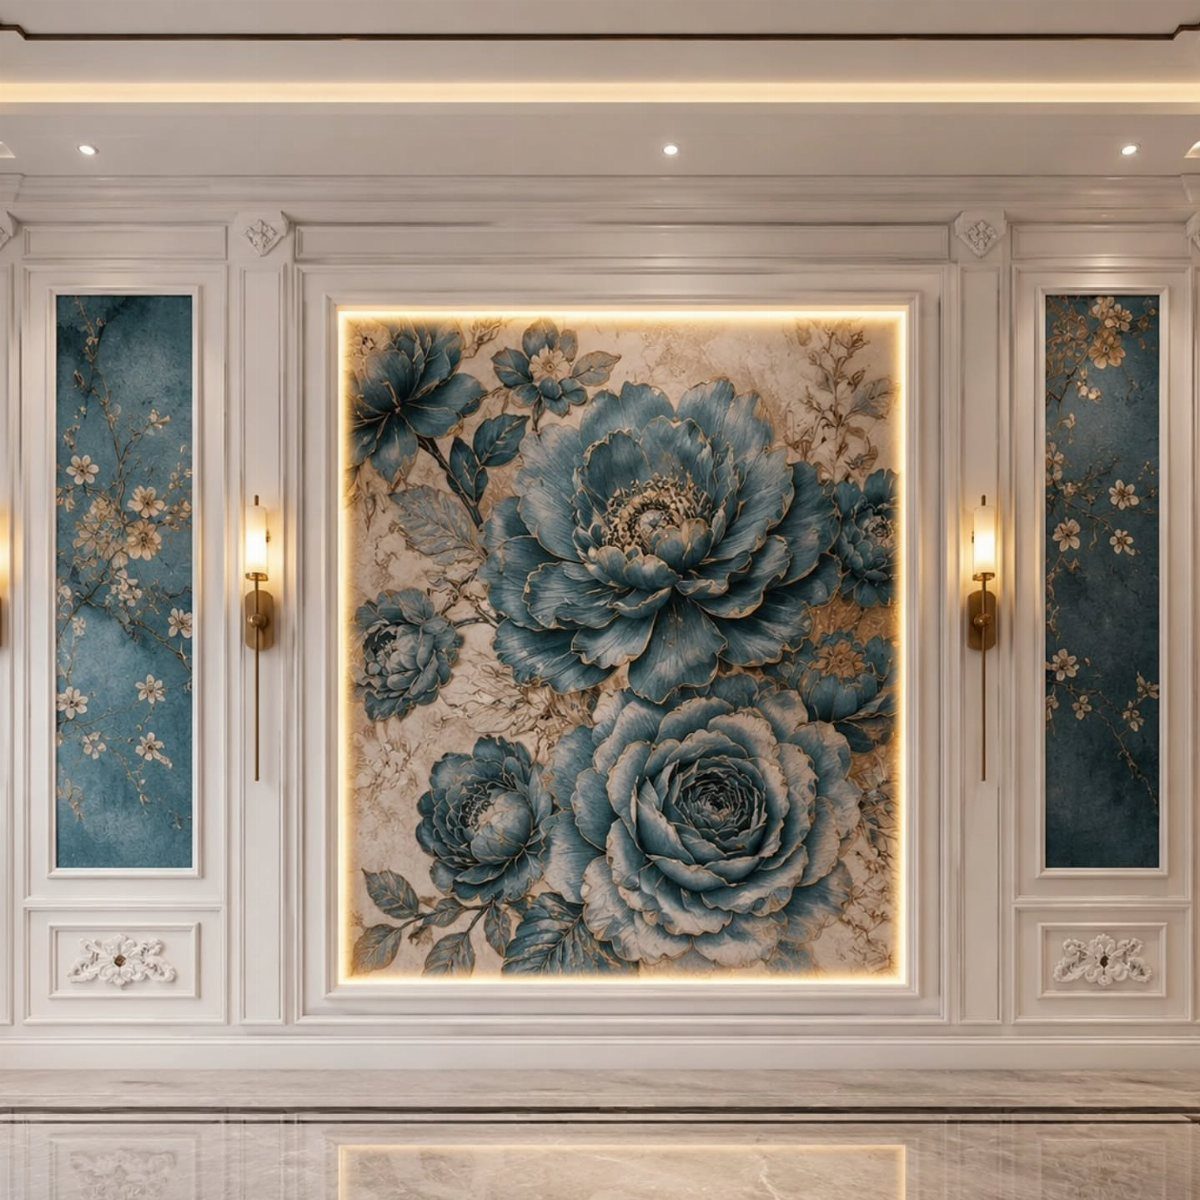
Picture molding around a mural turns wallpaper into something permanent and owned. A white frame does what a museum mat does: it tells your eye that the floral image is art, not background.
The warm backlight is the detail that makes this work without feeling stiff. LED strip behind the molding, set back so the glow diffuses, plugs into a standard outlet.
The mural itself must be smooth; texture or seams catch shadows and read as mistakes.
I would only attempt this where the wall is large enough for the frame to breathe. A small room makes the border feel like a cage.
Side panels can repeat the mural’s vertical motif at a narrower scale, which keeps the composition from collapsing inward.

Precise Positioning – We provide right angle auxiliary measuring cardboard for precise positioning when installing inside and outside frames

Seamless Application - Peel and stick design ensures hassle-free installation, no tools required

1.[Elegant Champagne Gold Finish] Features warm champagne gold tones with a satin metallic sheen, adding a touch of luxury to any space without the overwhelming gloss. Perfect for complementing teak, rattan, or terracotta materials.
7. Moulding Framing Sconces and Art
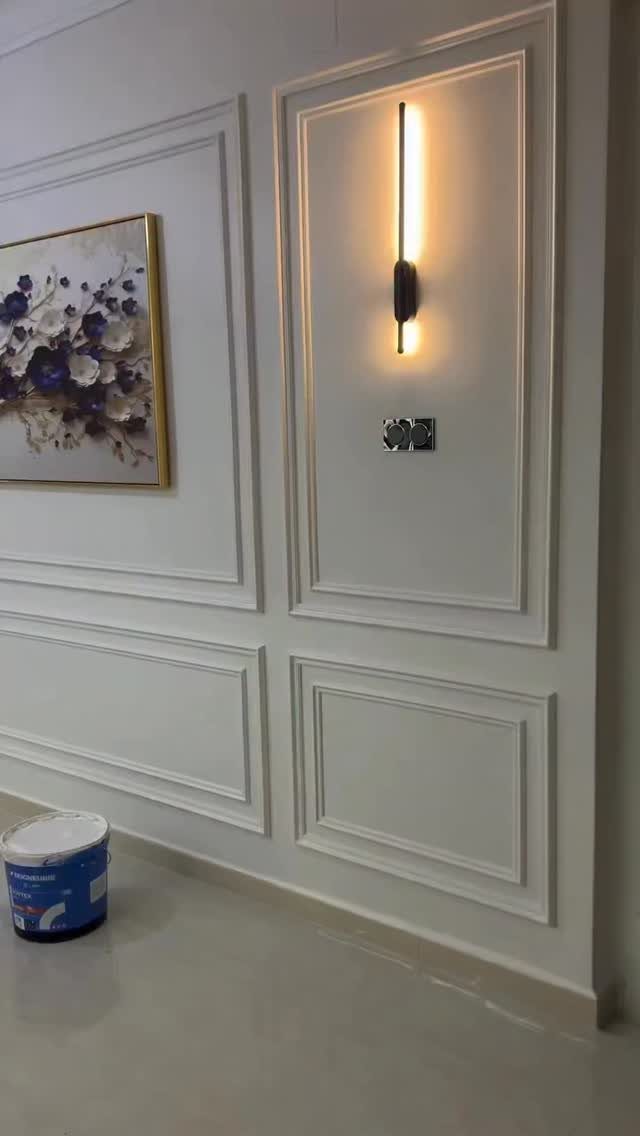
Sconces and art sit differently inside moulding than they do on flat drywall. The frame becomes part of the composition, so the piece you hang needs to feel intentional, not squeezed in.
I leave a few inches of wall between the moulding inner edge and the frame or fixture. Less looks crowded; more loses the connection.
For a sconce, the electrician needs to rough in before the moulding goes up, or you will be cutting around existing boxes and hoping the cover plate hides the seams.
A narrow ledge of moulding can catch light downward and cast a shadow line I find distracting.
I prefer sconces with a backplate that sits nearly flush, or ones designed to look like they were always meant to live inside that rectangle.

【Vintage Ornate Design & Durable Frame】: Showcase your favorite memories with this stunning 12x16 picture frame. It features an ornate, vintage-inspired design with intricate gold-tone detailing set against a rich brown base, adding a touch of timeless elegance to any space. Crafted from high-density polystyrene, it offers the look of classic wood molding with enhanced durability and a lightweight structure.

Premium Quality: Handmade antique gold frame with ornate scallop edge design, featuring real glass front and soft black velvet back. Durable resin construction ensures long-lasting elegance for your cherished photos.

ELEGANT EUROPEAN DESIGN: Special vintage appearance with wonderful details. This 4x6 picture frame will light your room and make your room very elegant. The cute frame is perfect for your meaningful pictures and art prints. It gives an old world touch of charm, and fits well for the black-and-white photos.
8. Stepped Corner Picture Moulding
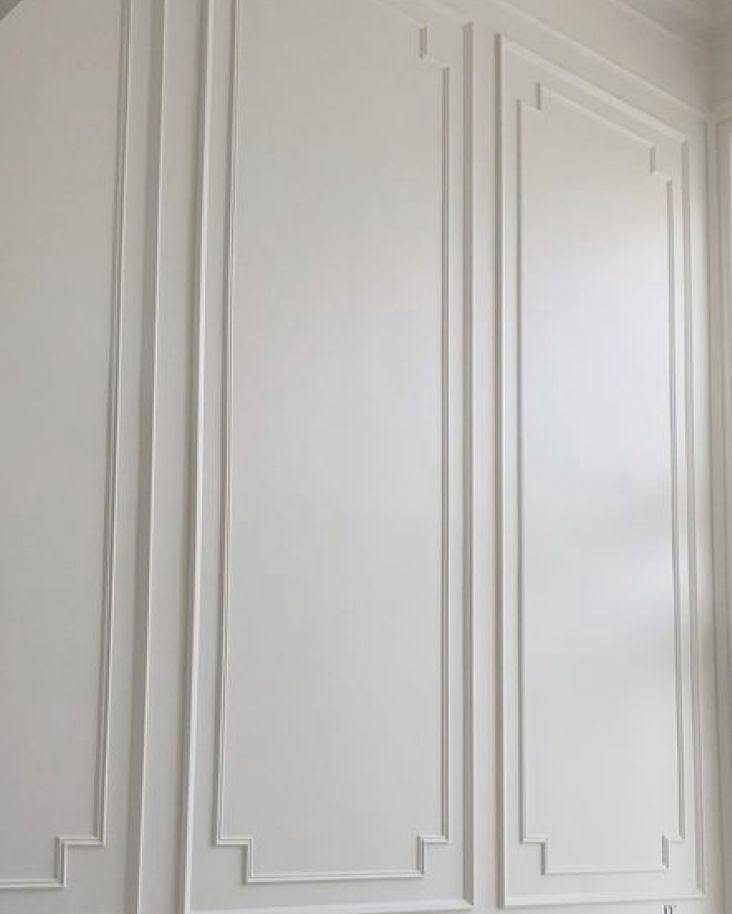
The stepped corner detail changes how light hits the joint. Instead of a plain miter, the profile steps back, so a tiny gap at the corner matters less than it would on ornate moulding.
That forgiveness is real, though it does not mean you can skip dry-fitting.
I glue and pin the frame on the floor first, checking corners with a carpenter’s square before the nail gun comes out.
The back gets sanded with 80-grit if the wall bows even slightly; a frame that rocks will never sit clean. I leave the last side loose until I have the frame leveled and the corners closed, then pin it off.
Wood filler on nail holes, not caulk. Caulk shrinks into a dimple after painting and the whole frame looks handmade in the wrong way.

ELEGANT DESIGN: The gorgeous 2-light wall sconce features a striking twisted metal arm design that adds a touch of modern artistry to any space. The fabric lamp shades diffuse a warm, soft glow, creating a cozy and inviting ambiance while eliminating harsh glare

【Cordless & Easy to Install – No Wiring Needed】Say goodbye to complicated wiring and electrician costs! These battery operated wall sconces are truly cordless – mount them anywhere in minutes with the included hardware. Perfect for bedrooms, hallways, bathrooms, or any spot without an outlet. Even during a power outage, your rechargeable wall sconce keeps shining reliably.

【Battery wall sconces, easy to Install】Battery operated wall sconce-No wiring required. Includes all mounting hardware to easily mount the battery wall light on the wall. Effectively illuminates all spaces in your home during a power outage.
9. Two Tier Upper and Lower Panels
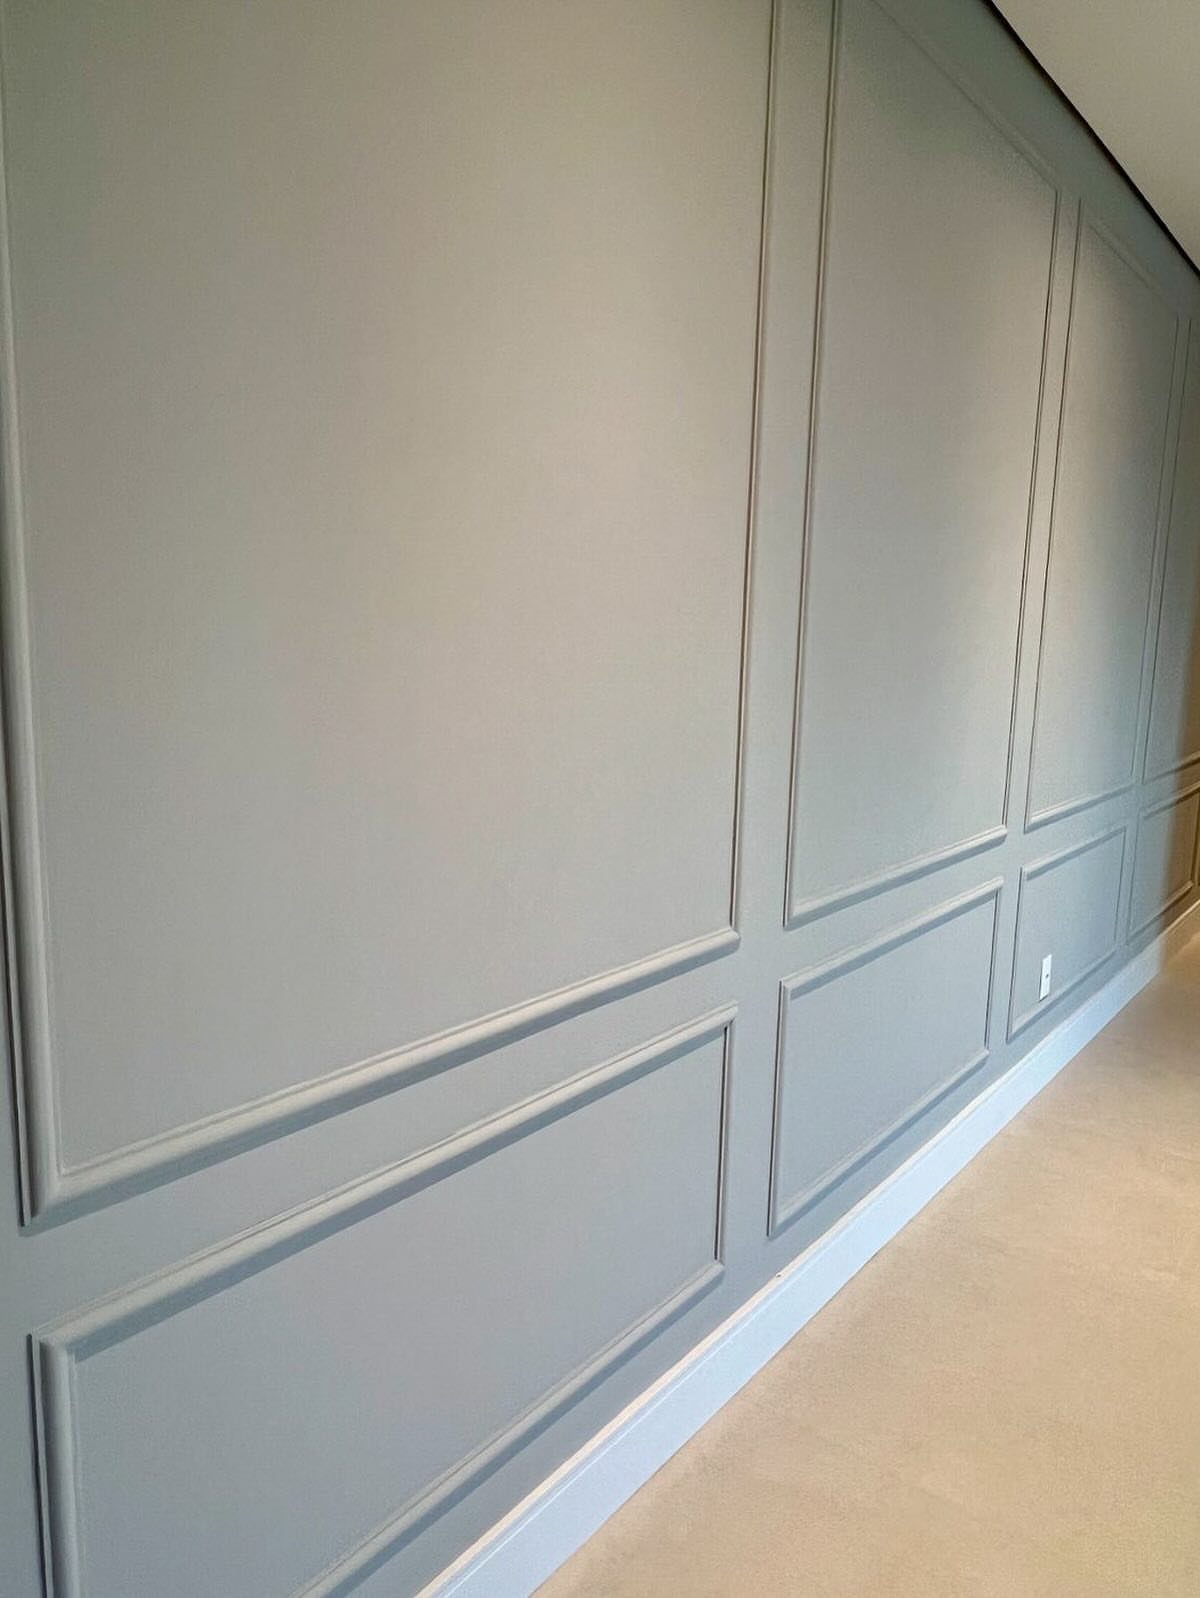
Two tiers split the wall into zones without needing a chair rail to announce it. The upper panels read as picture moulding, the lower as wainscoting, and the break between them is just empty wall space.
I like this for rooms where I want height but not formality.
The lower boxes should sit taller than they are wide, or the proportions feel squat. I usually run them a comfortable distance up from the baseboard, then start the upper frames with a gap that feels balanced.
The exact numbers shift with ceiling height; a standard room wants tighter spacing than something with taller ceilings.
Paint the wall and moulding the same color and the tiers become texture, not stripes. I have seen it done in contrasting tones and it always looks like the moulding is wearing the wall rather than growing from it.

This cordless finish nailer that is 100% battery powered eliminates need for a compressor, hose or costly gas cartridges

【Compatible with DeWalt 20V MAX Battery】The cordless brad nailer Compatible with dewalt 20V lithium-ion batteries ,such as DCB206, DCB205, DCB204, DCB181, DCB182, DCB200, DCB203, DCB205-2, DCB204-2, DCB206-2, and more. Giving professionals who already own a DEWALT 20V Max battery the flexibility to use their preferred battery. (Pay Attention! Tool only)

Important Note: To help you master the operation of this product quickly, please read the following steps carefully: ① Operating Steps for Brad Nails: Install the De-walt battery → Press and hold the power button for 2 seconds → Press the power button once → Unlock the safety latch → Fire the nail; ② Operating Steps for Staple Nails: Install the De-walt battery → Press and hold the power button for 2 seconds → Press the power button twice → Unlock the safety latch → Fire the nail; Please note: This product only includes the tool and 2000 pieces of nails, battery is not included.
10. Lower Wall Picture Moulding Wainscoting
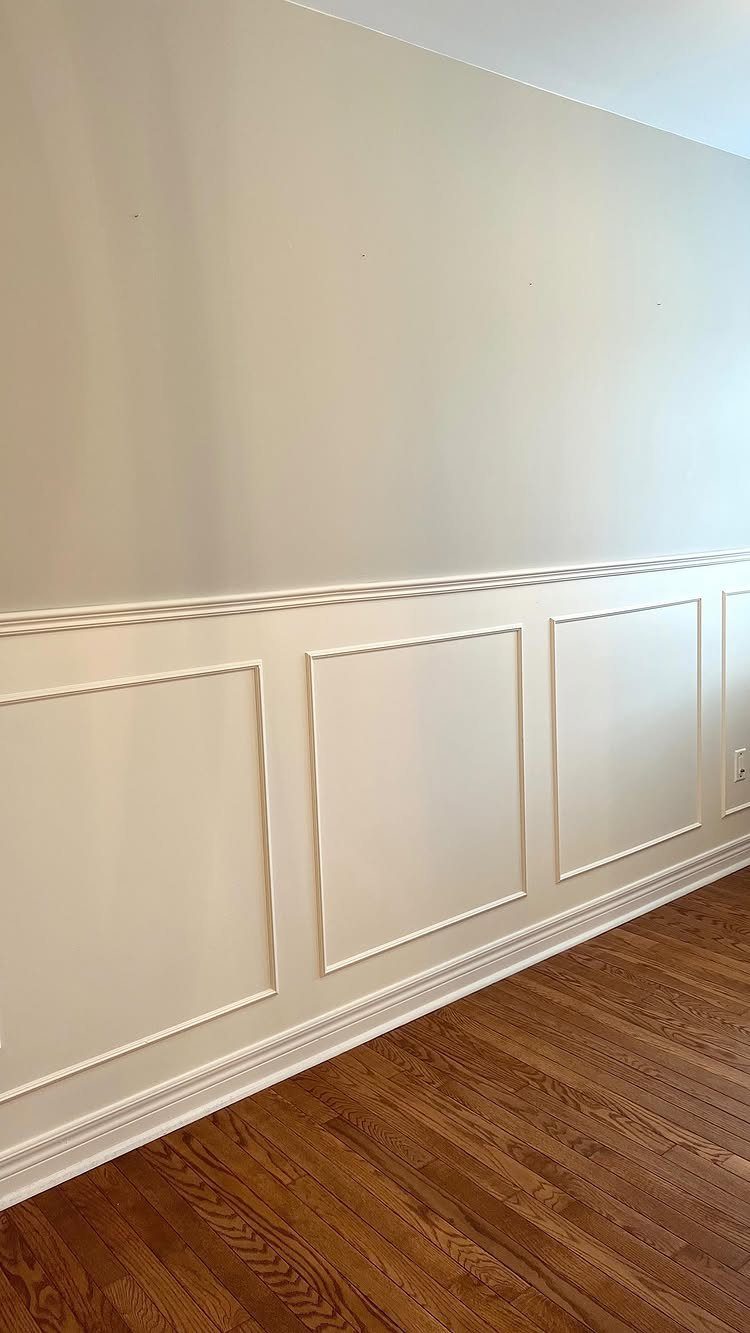
Lower wall wainscoting with picture moulding keeps the upper wall free for color, texture, or nothing at all.
It is the least committing version of this whole list; you are only buying and installing half the material, and the chair rail gives you a natural stopping point.
I run the boxes a couple feet up from the floor, adjusting for baseboard height. Too low and it reads as baseboard that got ambitious; too high and it competes with furniture backs.
This is the idea I would hand to someone who wants the look but has never run a mitre saw before.
Fewer cuts, less wall to keep straight, and the hardwood floor provides a built-in level line if your baseboards are true.

READY. SET. PAINT!: 1 ScotchBlue Original Multi-Surface Painter's Tape Applicator and Starter Roll (1.41 inch wide x 20 yards), the go-to tool for faster, easier precision paint prep
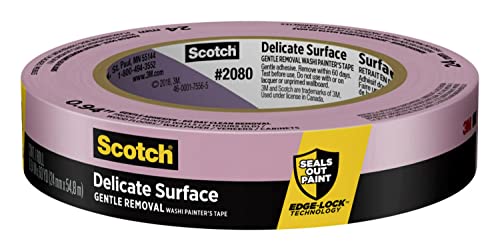
READY. SET. PAINT!: 1 roll of 0.94 inch wide Scotch Delicate Surface Painter's Tape, a versatile solution for protecting surfaces that require a little extra care when preparing to paint your living or working environment

White Masking Tape 2 Rolls, 330 FT Total: TONOS white masking tape includes 2 rolls, each measuring 0.7 IN x 55 YD / 18mm x 55m, for a total of 110 YD / 330 FT. The width gives better control for trim, edges, labeling, crafts, school projects, and detail masking. For typical trim, baseboard, and wall-edge masking, 2 rolls can help cover approximately 4–6 small rooms, depending on room size and layout.
11. Framed Art Prints Within Moulding
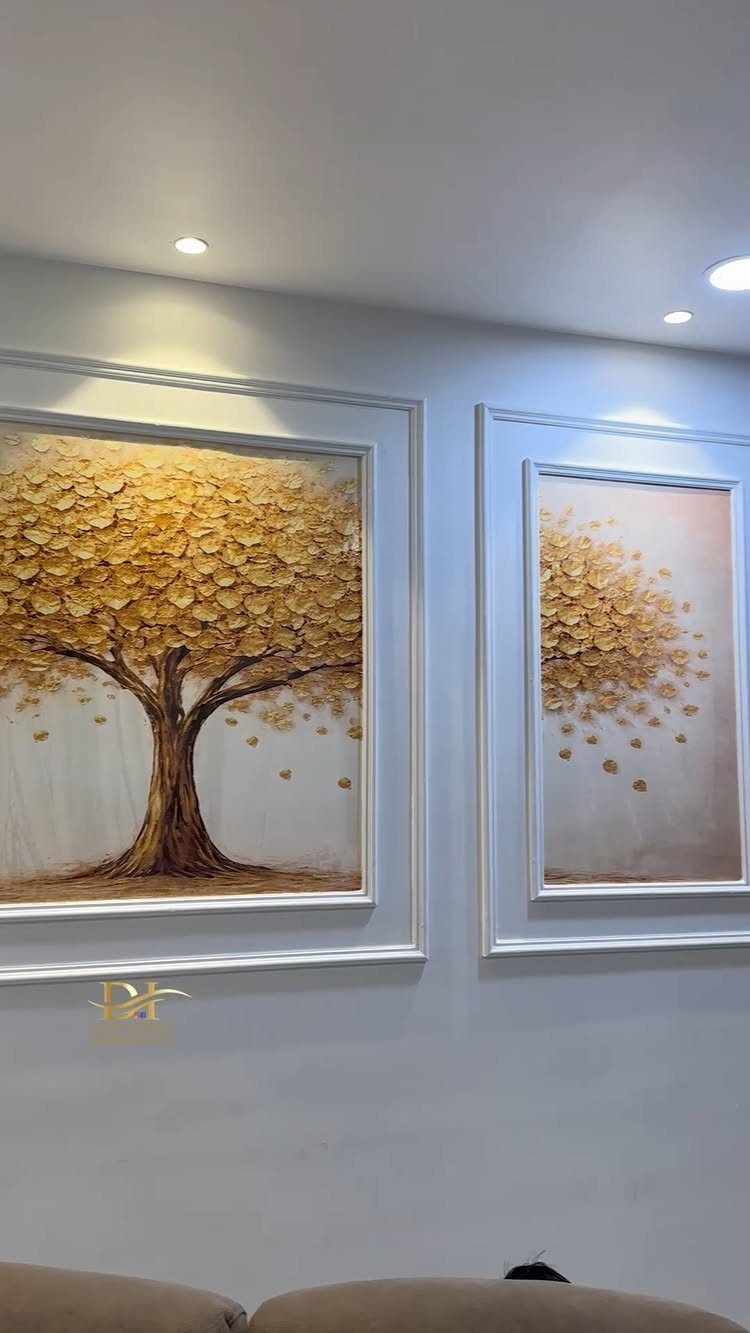
The moulding here does not frame empty wall; it frames something already finished. The art and the architecture become one piece, which means the art needs to stay put.
I would not do this with anything I rotate seasonally.
Sizing is the whole job. The moulding should extend past the canvas on each side, enough to feel deliberate, not enough to float the art in a sea of frame.
I measure the piece, add my margins, then build the box. Reversing that order means living with a gap that nags.
I have seen this with unframed canvases and with pieces in standard frames. The cleaner edge wins every time; a ornate frame inside ornate moulding starts to look like a mirror in a mirror.
Installation Techniques
A laser level is the one tool I would not substitute. Pencils and spirit levels work for short runs, but a long wall invites drift that shows up after the paint dries.
Set the laser at your baseline height and work to the line, not to the ceiling, which is rarely level itself.
Mark stud locations on the floor with painter’s tape before the laser goes up. Once the beam is running, you do not want to break concentration to hunt for studs.
Design Inspiration
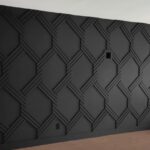
Traditional homes already carrying crown molding want ornate profiles that match the vocabulary of what is there. Modern homes with clean lines need simpler, geometric patterns; the molding should read as texture, not as decoration shouting for attention.
I would scroll past anything that treats picture frame molding as a generic add-on. The best installs look like they were specified when the house was built, not pinned on afterward.
For my own eye, a room with existing plaster cornices wants deep, stepped profiles; a flat-ceilinged box from a few decades back wants something quieter, maybe just a flat stock with a small back band.
With the addition of simple strips of wood—molding—walls can go from basic to incredibly ornate.
Budget Considerations
Red oak, poplar, birch, and maple are the species to ask for at a lumberyard. Each takes paint well and holds crisp detail at the corners.
Metal or aluminum trim costs more but suits bathrooms or kitchens where moisture will eventually find wood.
Polystyrene is the budget path. It is light enough to cut with a utility knife, which matters if you do not own a miter saw, and it survives water better than MDF.
I would not use it in a high-traffic hallway where shoes kick; the surface dents more easily than wood.
Common Mistakes
Incorrect measurements show up at the fourth rectangle, not the first, because small errors compound. Without it, fatigue sets in and the spacing drifts by 1/4 inch per box.
Angles go wrong on walls that are not square. A miter saw set to a standard angle assumes a perfect corner; most walls are off by a degree or two either way.
Cut one test joint from scrap, hold it to the actual corner, and adjust the saw before the real stock touches the blade. Two pieces of scrap are cheaper than 8 feet of poplar left too short to use.
Frequently Asked Questions
How expensive is picture frame molding?
A full wall runs a few hundred to a thousand dollars, depending on how many boxes you build and whether you already own a miter saw and nail gun.
Stock trim in longer lengths saves money because you buy fewer pieces and end up with fewer joints to hide.
I would rather spend more on paint and caulk than on fancier molding; the finish work matters more than the profile.
How do I make a DIY picture frame using moulding?
Start with painter’s tape on the wall and live with the outline for two days before cutting anything.
How to adhere moulding to a wall?
I run a bead of construction adhesive across the back of each piece, then drive nails along the length and at every corner to hold it while the glue cures.
Alternating nail directions on vertical pieces keeps the pull even, and pinning the frame before the adhesive sets keeps everything square.
What is the difference between wainscoting and picture frame molding?
Wainscoting covers the lower wall section, usually with a chair rail capping it, while picture frame molding can live at any height and often floats in the middle of the wall.
That version uses half the material and half the cuts of a full wall.
What is the best type of trim for picture frame molding?
I use stock trim in longer lengths because fewer joints mean fewer chances for a seam to show.
Finger-jointed base cap molding is common and paints smooth, but wood, polystyrene, or even metal stock work if the profile is right for your room.
Stock trim in longer lengths saves work; fewer joints mean fewer seams that might open or catch light wrong.