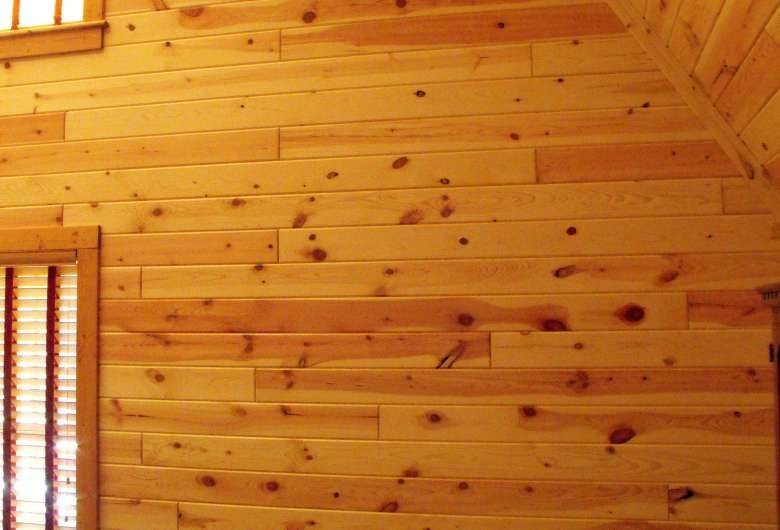
Pine shiplap comes in more flavors than the lumber aisle lets on: tight horizontal runs, vertical boards that stretch a low ceiling, raw knots left proud under clear coat, or grey weathering that reads like old fence board left standing.
Whether you leave the grain bare, wash it with lime, or paint it greige depends on one thing: how much time the wall has to change, because unfinished pine darkens to honey on its own whether you plan for it or not.
Most of these projects land in a weekend if the boards arrive ready to nail: pre-primed paint-grade, pre-finished natural, or mill-sawn raw that you plane smooth and seal later.
1. Horizontal Light Pine Planks
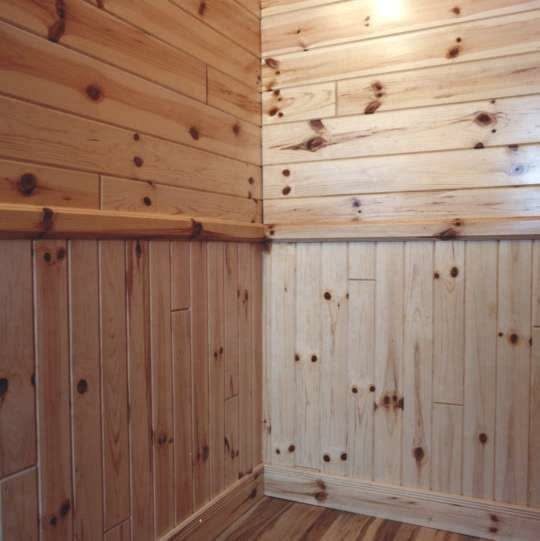
Horizontal planks pull the eye across a room and make it feel wider, which is why I used them on the upper half of a long hallway that always felt like a tunnel.
Light pine with open grain and scattered knots costs less from a mill supplier than from a big box store, and the bundles of 6-inch Tongue and Groove ship ready to install.
Stagger each joint well away from the next row’s, same as hardwood flooring, so no seam line jumps out.
A chair rail hides the transition if you switch to vertical below; it reads as wainscoting instead of a job half-finished. This suits renters in older homes with plaster that won’t take another coat of joint compound.
Light pine yellows in sun, so north-facing rooms keep that raw Scandinavian look longer than southern exposures.
2. Natural Wood Finish Pine Planks
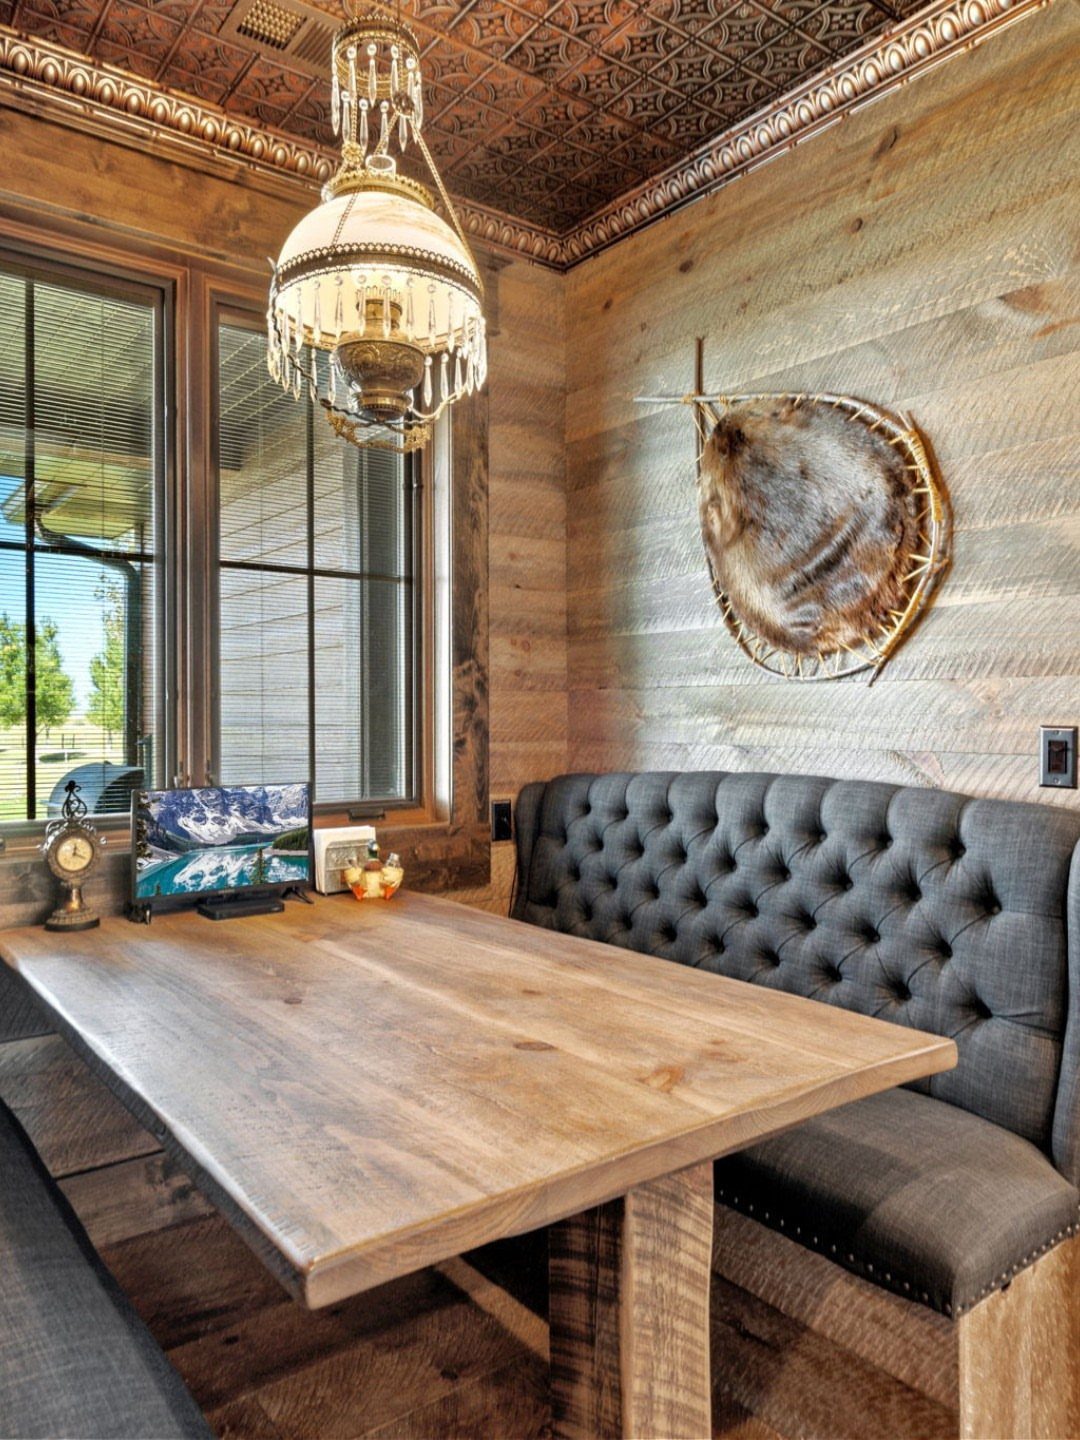
Unfinished pine darkens to a honey color on its own whether you want it to or not, so "natural" is really a decision to let time do the staining.
I left a kitchen nook raw and watched it match the table I built from the same batch of boards; the grain stayed visible because I hand-planed the fuzz off each plank before nailing, not sanded.
Sanding closes the pores and gives a flatter, more manufactured look.
A thin wash of white over raw pine, then wiped back immediately, cools the tone without hiding the grain; some hardware aisles sell it as "Swedish finish."
The real advantage of leaving wood bare is speed: no drying days, no fumes, no taping off the room.
It works best where you already have strong color somewhere else, a navy door frame or charcoal trim, because the wall itself stays quiet.
3. Whitewashed Pine Shiplap Planks
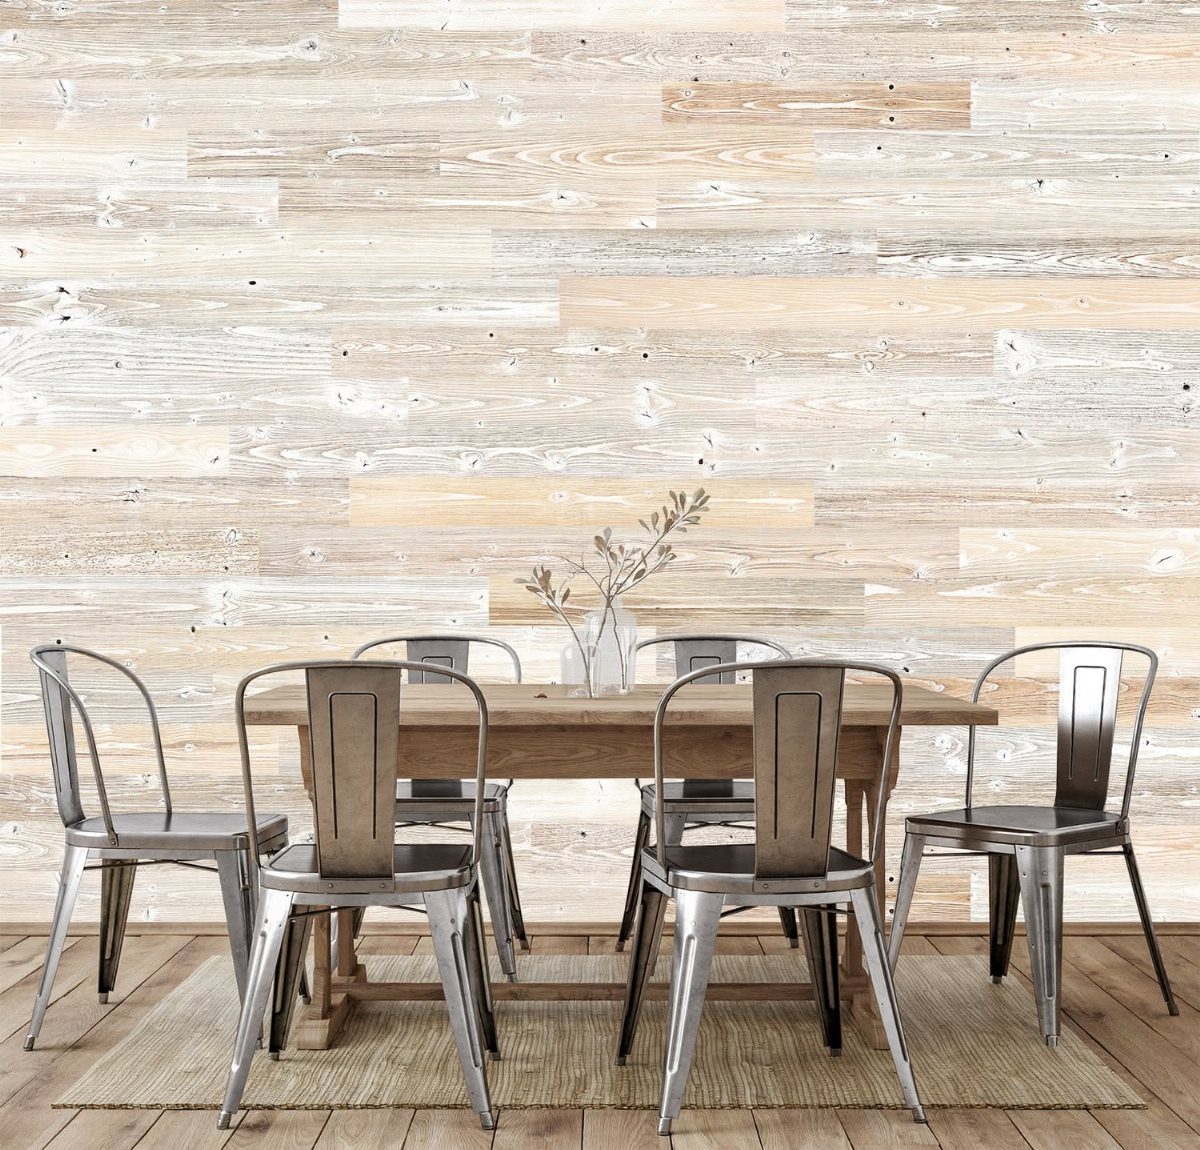
Whitewash is lime and water, not paint, which matters because it sinks in instead of sitting on top.
Hydrated lime from the masonry yard mixes cheap into enough whitewash for a whole wall, and brushes onto rough-sawn knotty pine without fighting the texture.
The boards drank it unevenly, so the high grain stayed pale and the valleys went whiter, which is exactly the aged look I was after.
A dining wall is the right place for this because food photography against it looks warm, not sterile like solid white paint would.
Store-bought white pine shiplap comes smoother; you’d need to scuff it with coarse sandpaper first or the wash beads up and looks like a mistake.
Reapply more often in a room that sees steam, since lime is more porous than acrylic.

𝗣𝗿𝗼𝗱𝘂𝗰𝘁 𝗗𝗶𝗺𝗲𝗻𝘀𝗶𝗼𝗻 - 100% solid pine, not pressboard. Each plank showcases genuine wood grain, rich pine scent, and unique character. Each plank measures 47.25" x 4.75" x 9mm, covering 15.4 sq ft. per box. Due to natural hardwood characteristics, dimensions may vary.

[Luxdecor Real Wood Wall Planks]:100% Real Pine Wood Wall Planks With Natural Knots and Dents, the Surface Of Wood Shiplap Planks Is Processed With High Temperature Carbonization, the Real Wood Wall Shiplap Planks Is Non-Toxic, Sterilized and More Safe For Children,Voc Free Process Ensures These Stick on Shiplap Planks For Walls Are Safe To Use In Home
4. Painted Pine Shiplap Accent Walls
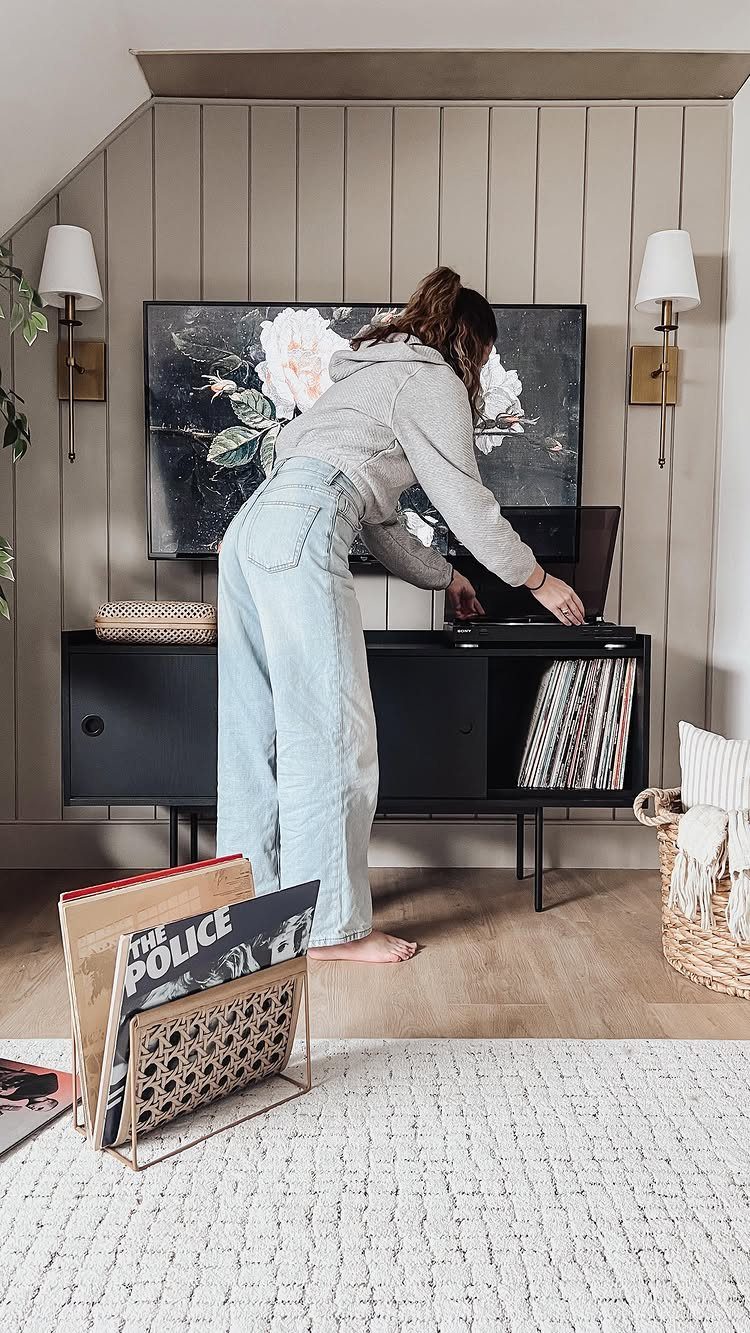
Vertical boards draw the eye up, which I forget every time and relearn when I stand in a room that uses them.
A media wall is the perfect spot because the lines echo the TV rectangle and the console below, so everything reads as intentional height instead of leftover architecture.
Sherwin-Williams "Pavestone" is a greige that shifts warm in afternoon light and cool at night, which hides the fact that shiplap gaps aren’t perfectly even.
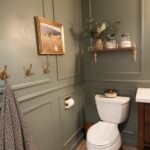
Sage green is the other color I see working now, especially with white ceilings and pale oak furniture; it reads as outside-in.
The trick with any painted shiplap is priming the tongue and groove faces before assembly, not after, because once interlocked you’ll never reach the raw edges that show when boards shrink in winter.
Two weekends: one to prime and let cure, one to paint and reinstall.

Real Wood Wall Planks: 100% Real Barn Wood Wall Planks With Natural Knots and Dents, the Surface Of Wood Shiplap Planks Is Processed With High Temperature Carbonization, the Real Wood Wall Shiplap Planks Is Non-Toxic, Sterilized and More Safe For Children, Voc Free Process Ensures These Stick on Shiplap Planks For Walls Are Safe To Use In Home
5. Knotty Pine Shiplap Planks
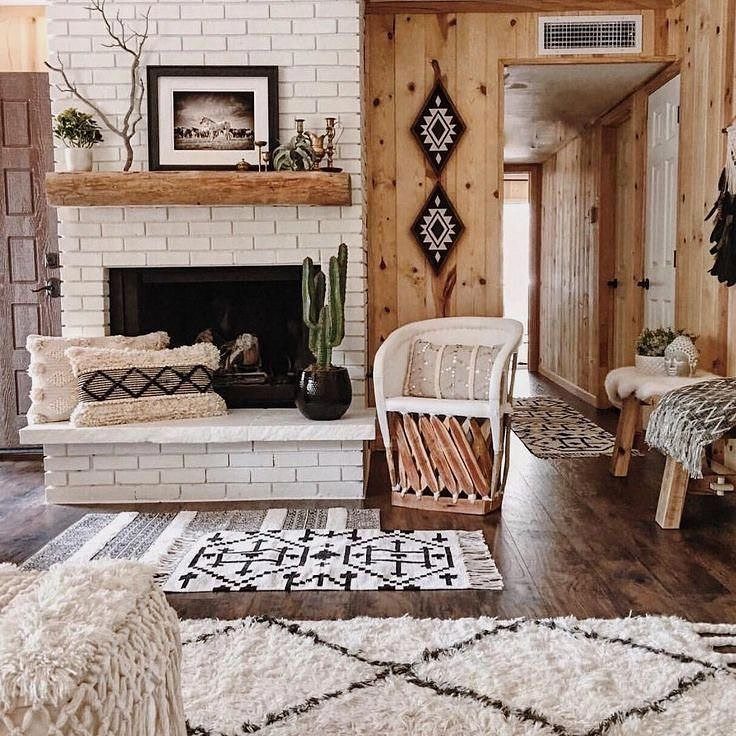
Knotty pine is a grade, not a species, which means you’re paying for the imperfections the lumber yard usually culls out.
Knotty pine belongs on a fireplace wall that needs to feel like it had always been there; the knots give your eye places to rest so the vertical boards don’t turn into stripes.
The planks came from a mill in Pennsylvania that still stocks old-growth longleaf, denser and more stable than the plantation pine at most retailers.
Dark floors and white painted brick balance the busyness of the wall; without that contrast, the room closes in fast. Knotty pine goes wrong in small spaces where every surface fights for attention.
If your room is under 12 feet in either dimension, use this on one wall only and paint the rest. The tongue-and-groove edge hides fasteners, but pre-drill near knots anyway; they split easier than clear grain.
6. Bathroom Pine Shiplap Wall
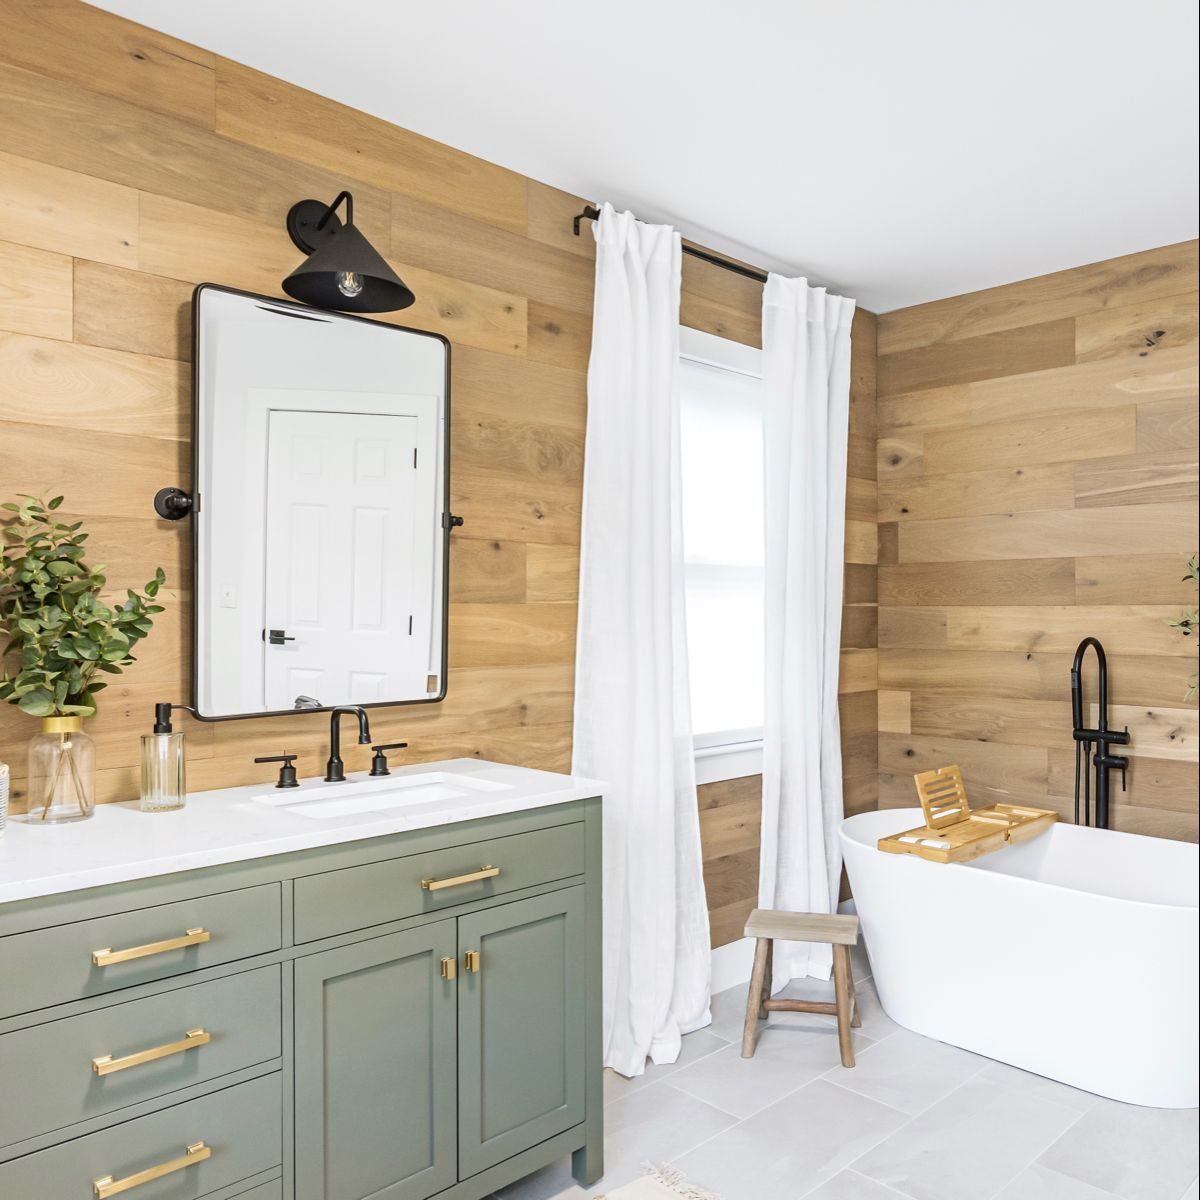
Pine in a bathroom is possible if you treat it like exterior siding: oil-based primer, two topcoats, and no shortcuts on the cut ends where water climbs in.
Standard-length planks on a tub wall need a bottom gap caulked with paintable silicone instead of wood filler, so the seam flexes when the tub fills and the floor settles.
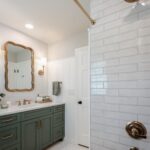
Brass handles on a vanity work because the warm metal echoes the wood tone; chrome would read cold against it.
Freestanding tubs need protection from splash more than built-ins do, since there’s no surround to catch spray. Check your fan’s rating before you start: too little airflow and the humidity will find every unsealed corner.
Pine is soft; expect dents from towel hooks and learn to live with them, or choose a harder wood.
7. Vertical Pine Shiplap Planks
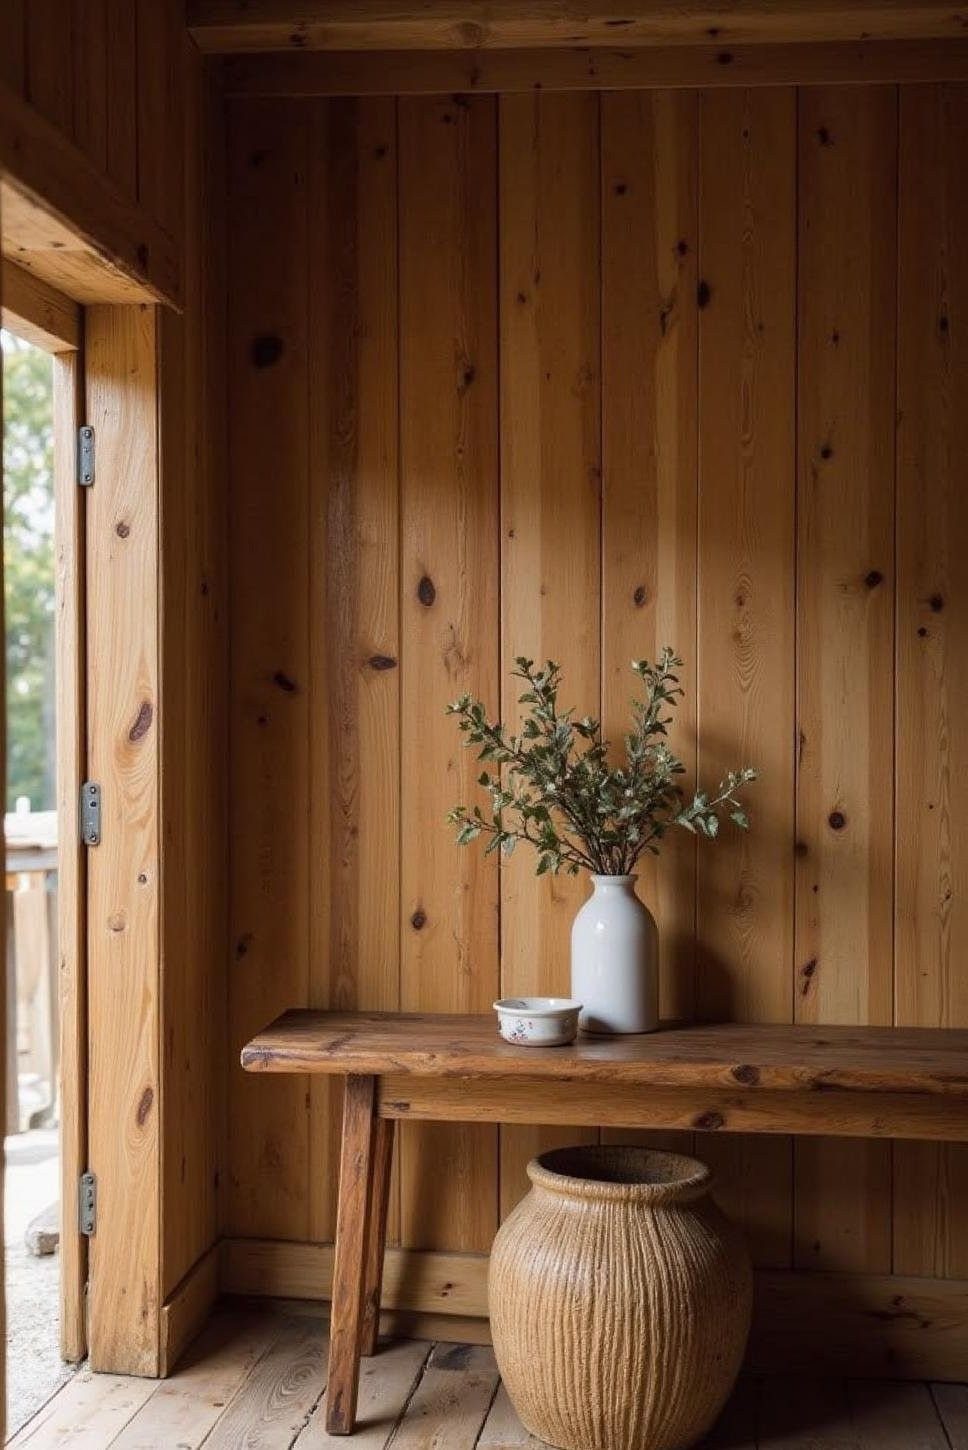
Vertical boards pull the eye up and make a ceiling feel higher than it is, which matters in older homes with 8-foot walls. Keep the spacing tight; anything over 1/8 inch between boards starts looking like a fence.
A matching chair rail caps vertical pine nicely where the wall meets a horizontal run in the next room. That transition kept both spaces from fighting each other.
Paint opens up more options here than with horizontal shiplap. Sage green vertical walls with white ceiling planks read cottage instead of barn, and natural pine suits a corner bench setup.
Either way, vertical grain hides wall waviness better than horizontal does; boards run across the flaws instead of with them.
Best for: narrow rooms, low ceilings, or anywhere you want to break the expected pattern without leaving pine behind.

Transform your space effortlessly without searching for separate parts. Each package comes complete with 8 premium main wall panels and 2 perfectly matching finishing trims. This curated set provides everything you need to create a cohesive, designer-level accent wall or elegant half-wall paneling right out of the box.

Versatile Use: Ideal for barn wood accent walls and various DIY projects.

[Luxdecor Real Wood Wall Planks]:100% Real Pine Wood Wall Planks With Natural Knots and Dents, the Surface Of Wood Shiplap Planks Is Processed With High Temperature Carbonization, the Real Wood Wall Shiplap Planks Is Non-Toxic, Sterilized and More Safe For Children,Voc Free Process Ensures These Stick on Shiplap Planks For Walls Are Safe To Use In Home
8. Weathered Grey Wood Accent Wall
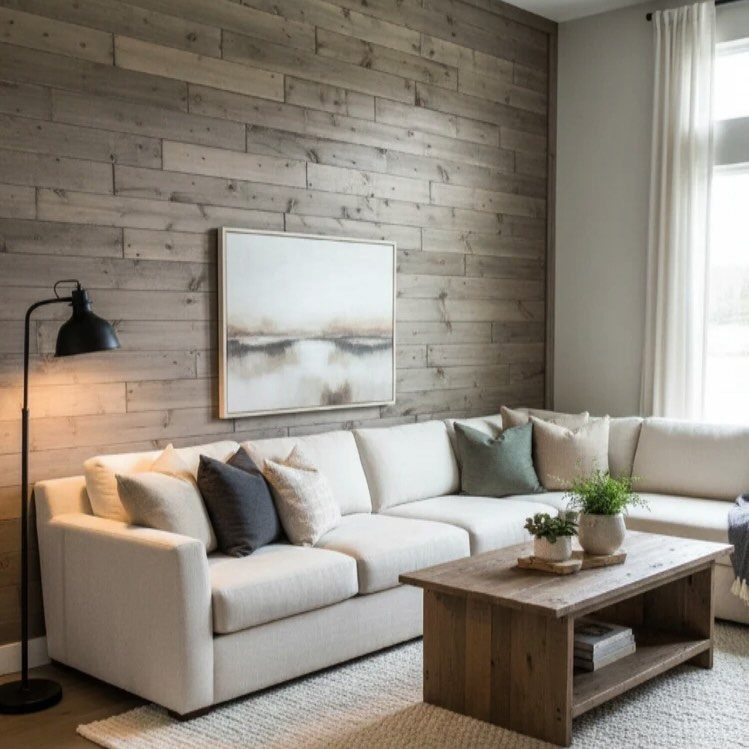
Weathered grey starts with pine and ends somewhere between driftwood and old fence board, which is the point. The look comes from layering: a grey wash over a white base, or milk paint thinned enough that the grain ghosts through.
A wall split at chair rail height, natural on top and washed on the bottom, works if your furniture line hits near that break.
That cool tone against cream upholstery needs warmth added elsewhere in the room. A wooden coffee table with some age on it, brass or black metal lamps, textiles that lean linen rather than stark white.
The wall does the heavy lifting; let it.
Cost stays reasonable because pine takes stain unevenly on purpose. That blotchy first coat becomes texture, not mistake.
Sand between layers if you want control, stop after one if you do not.
Best for: living rooms where you want the wall to feel found rather than finished, and for anyone nervous about committing to color; grey drifts back to neutral faster than blue or green ever will.
9. Rustic Multi-Toned Wood Planks
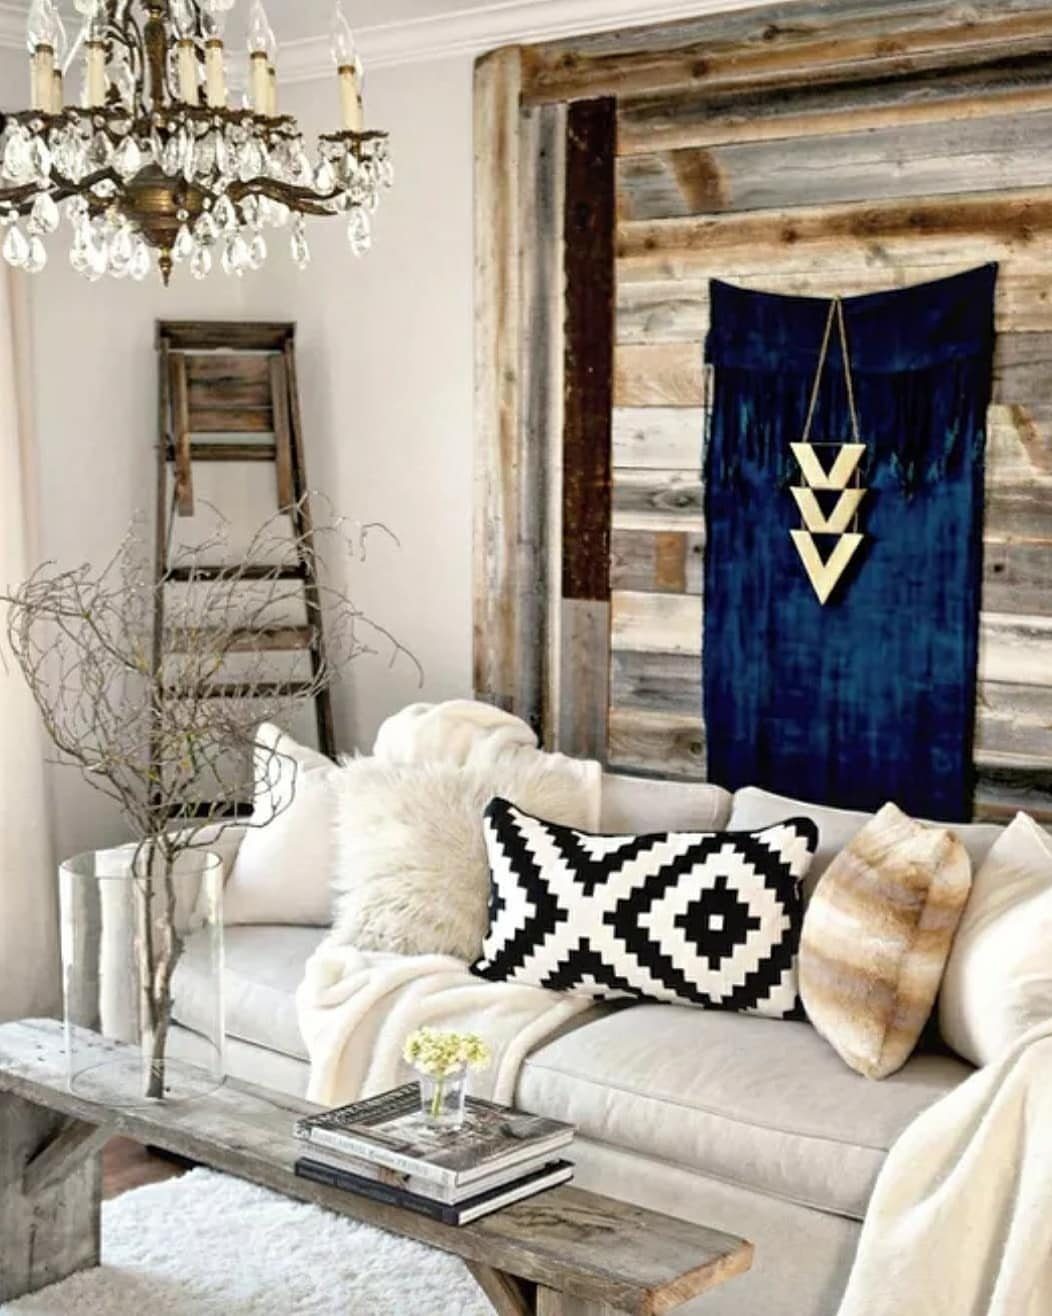
Mixed tones on one wall come from using boards that did not match to start with, or from staining identical boards in batches and shuffling them as you nail.
The rustic look comes from varied weathering, not varied species; all pine, just handled differently.
Some boards sat in the sun before install, some got a quick vinegar and steel wool wash, some went up raw and ambered on their own.
A crystal chandelier against that rough wall works because the contrast is deliberate. Too much refinement elsewhere and the room turns theme-park; too little and you are camping.
The line sits at about one polished piece per rough surface.
Overlapping shiplap joints help here. When tones shift board to board, you want shadow lines between them; flush joints read as stripe instead of texture.
Leave the face nails if you can stand them, or punch and fill with a color-matched putty that does not try to hide.
Best for: large walls where a single color would go flat, and for anyone with access to reclaimed pine or a willingness to fake the age.

PRIMED & READY TO PAINT: Factory-primed solid pine planks are ready for your chosen paint color, helping you create beautiful beadboard wall panel designs for wainscoting, bathrooms, hallways, and interior wall panels. Each box includes 12 individual wainscoting planks that install one by one to create a wainscot look. One box covers up to 3.5 linear feet of wall when installed vertically. As a natural wood product, allow 48–72 hours for acclimation before installation.
Installation Tips
A 4-foot level is the minimum length for shiplap; anything shorter follows the wall’s dips instead of correcting them.
I check every third board with the level held vertically against the face, not the edge, because the tongue can throw a torpedo level off by 1/8 inch.
Pre-drilling matters most within 2 inches of any board end and anywhere a knot shows on the face. The bit should match the shank of your finish nail, not the head, so the nail grips by friction instead of wedging.
I set the depth stop on my drill to the plank thickness minus 1/16 inch; going deeper weakens the tongue.
Start from the corner that eyes hit first when you enter the room. The cut board goes on the far side where trim will eat the gap.
Maintenance Advice
Bathrooms need checking every 6 months where the tub meets the wall and behind the vanity. Caulk shrinks; when the bead pulls away from the pine, water follows it in.
I re-caulk before the gap reaches 1/16 inch.
Humid rooms elsewhere, the enemy is the back of the boards you cannot see. A moisture meter on the face reading over 16% means the back is worse.
Ventilation fixes most of this; 1 cubic foot per minute per square foot of room is the fan minimum, and I run it 20 minutes after the shower ends.
Dents in soft pine can be lifted with a damp cloth and a clothes iron on medium. Steam swells the compressed fibers back up.
It does not fix gouges, only dings.
Design Considerations
Contrasting materials keep shiplap from reading as a stage set. I pair pine with plaster or matte tile, never with more wood grain.
One textured surface per sightline is enough; the eye needs a place to rest.
White ceiling planks against sage green walls work because the horizontal line of the ceiling breaks the vertical rhythm. I would not add a third wood tone in flooring; stone or concrete reads as ground, not competition.
A grey vanity with white top and light wood shelves works in farmhouse bathrooms because each material has a job. The wood warms, the stone cools, the painted shiplap mediates between them.
Swap any two and the balance tilts.
Cost Comparison
Pine shiplap usually costs more than standard drywall with joint compound and paint, though the gap narrows if you finish the drywall yourself.
The gap narrows when you figure labor: shiplap goes up finished, drywall needs 3 visits minimum for mud, sand, and prime.
I buy from a mill when the job passes 200 square feet. Savings over big box bundles add up fast when the tongue-and-groove is already milled.
Under that, retail bundles save the gas.
The knots you pay extra for at a home center are the culls I pick through for free.
Frequently Asked Questions
Is pine good for shiplap?
Mill suppliers sell 6-inch tongue-and-groove pine bundles for less than the big box stores, and they arrive ready to nail up. The open grain and scattered knots give it character that paint or stain can work with, not against.
Unfinished pine ages to honey whether you plan for it or not, so build that shift into your color plan from day one.
Is shiplap outdated in 2026?
Shiplap still reads as intentional in the right room, especially when you break the expected pattern.
Vertical boards on a media wall, weathered grey in a living room, or mixed tones on a large wall all feel found rather than finished.
Farmhouse and rustic styles still put shiplap to work in 2026, so it holds up if that is the look you are after.
What are the downsides of shiplap?
Pine dents easily; towel hooks and everyday bumps will leave their mark.
Bathroom humidity seeps into every unsealed corner unless you start with oil-based primer, follow with two topcoats, and run paintable silicone caulk along the bottom gap instead of wood filler.