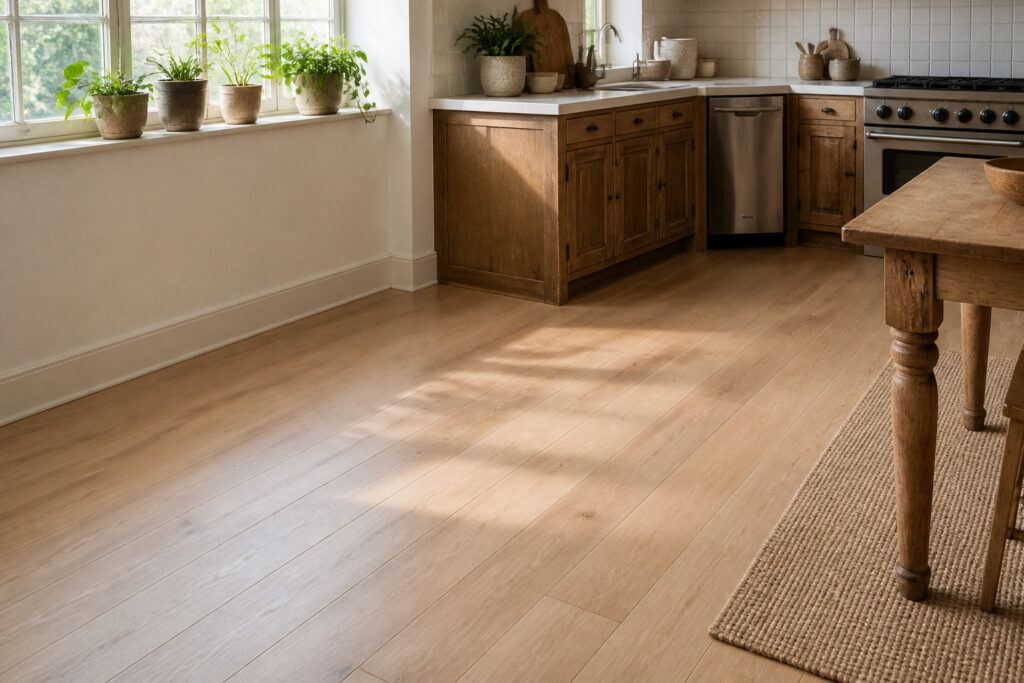
Installing vinyl plank flooring means locking together interlocking planks over a prepared subfloor, usually as a floating floor that needs no adhesive.
The material must sit in the room for 48 to 72 hours first; skip that acclimation and you risk gaps opening by the following season as heat and humidity shift the planks.
I learned that the hard way after leaving mine boxed in a corner, which trapped humidity inside and cost me visible seams by February.
Acclimate the Flooring
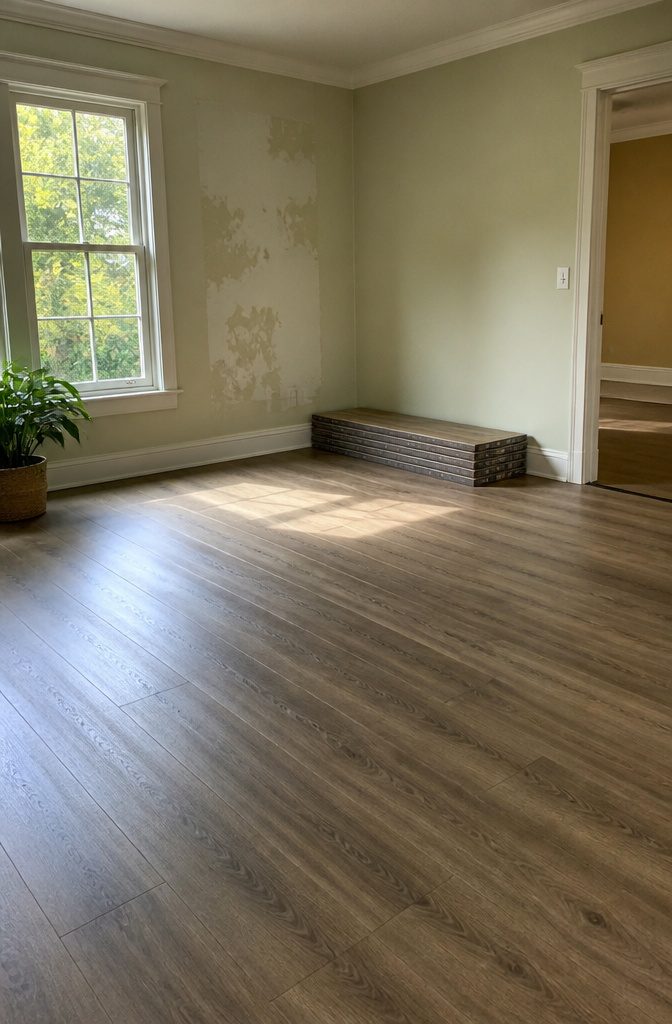
Vinyl plank flooring needs 48–72 hours in the room before you cut the first plank. I left mine stacked in the corner still boxed and paid for it with gaps that opened by February.
The material expands with heat, contracts with cold, and the room you’ll install in is nothing like the warehouse or truck it came from.
Those boxes trap humidity inside; slit them open so air circulates through the stack. Lay the planks flat, not propped upright where they’ll bow under their own weight.
I skipped acclimation once on a quick weekend job. The planks had sat in a cold garage, then went down in a heated house.
By spring the seams had opened enough to catch a sock. The floor itself stayed sound, but the visible gaps never fully settled back.
Two days is the minimum.
Three is smarter if the weather’s been swinging or the delivery sat outside. The time feels wasted when you’re itching to start, but it’s the cheapest insurance in the whole project.

🔨【1/4 Inch& 1/2 Inch】Different from other triangular spacers, our gaskets are available in 2 sizes, 1/4 inch and 1/2 inch, Meet your needs for larger gaps. and the quantity is 20pc, which is enough for you to use. Let you install your laminate wood flooring more conveniently and easier.

1/4 INCH & 1/2 INCH DESIGN: The flooring spacers include 1/4 inch and 1/2 inch gaps from the wall, can provide an appropriate expansion gap between the floor and the wall, to avoid damage.

【Ultra-Stable Wide-Base Design】- Engineered with a significantly wider base and thicker contact surface, these Upgraded spacers provide superior stability compared to flimsy L-shaped or triangular alternatives. The expanded footprint prevents the spacers from slipping, tipping, or sliding—even during heavy tapping—ensuring your expansion gap stays perfectly intact.
Prepare the Subfloor
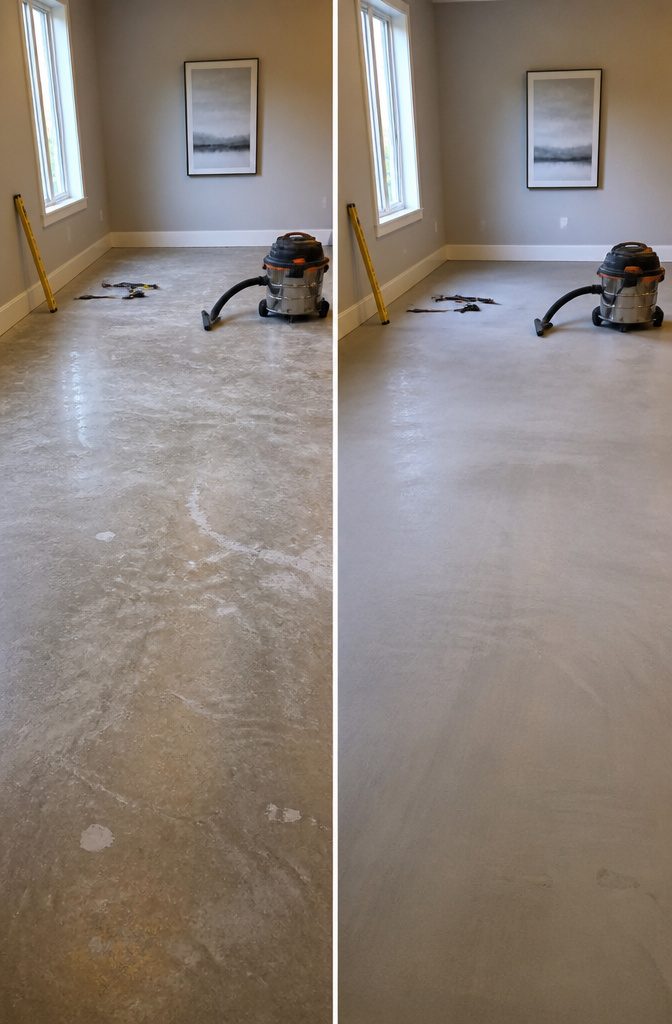
Vinyl plank flooring will telegraph every bump and seam underneath it, so the hour spent on prep saves days of regret.
I start by pulling everything out, sweeping, and then vacuuming with a shop vac to get the grit a broom misses.
Nails, staples, or raised screw heads get pulled or sunk below the surface; anything left proud will eventually show through.
A 6-foot level or a straight 2×4 laid across the floor reveals the real problem spots. The standard to hit is 1/8 inch variation over 10 feet; more than that and the planks can bounce, separate, or wear unevenly.
For dips in a wood subfloor, I use floor patching compound mixed to a spreadable consistency and feather the edges out with a putty knife.
Concrete cracks get filled with concrete patch, and larger depressions take self-leveling compound poured to find their own plane.
The patching feels like delay, but walking on a floor that does not flex or click where it should makes the wait worth it.

𝐄𝐟𝐟𝐨𝐫𝐭𝐥𝐞𝐬𝐬 𝐃𝐈𝐘 𝐈𝐧𝐬𝐭𝐚𝐥𝐥𝐚𝐭𝐢𝐨𝐧:Achieve a seamless upgrade with our peel and stick floor tiles. No grout, glue, or special tools needed. Simply peel the self-adhesive backing and stick the vinyl flooring directly onto clean, smooth subfloors. Easily trimmed with scissors for a perfect fit around corners and edges. The flexible planks allow for custom splicing patterns, making it the ultimate renter-friendly and easy flooring to install solution for any DIY enthusiast

Premium Design-Led Aesthetic: Authentic wood visuals in extra-wide 9” x 72” planks deliver a high-end, modern finish that elevates any space. Micro beveled edges offer a clean, seamless look.

【Ultra-Durable & Pet-Friendly】With a 0.3mm wear layer tested over 15,000 abrasion cycles, this luxury vinyl plank flooring resists scratches, dents, and spills. Ideal for busy homes with pets and kids, it stays beautiful for years even in high-traffic areas.
Remove Baseboards
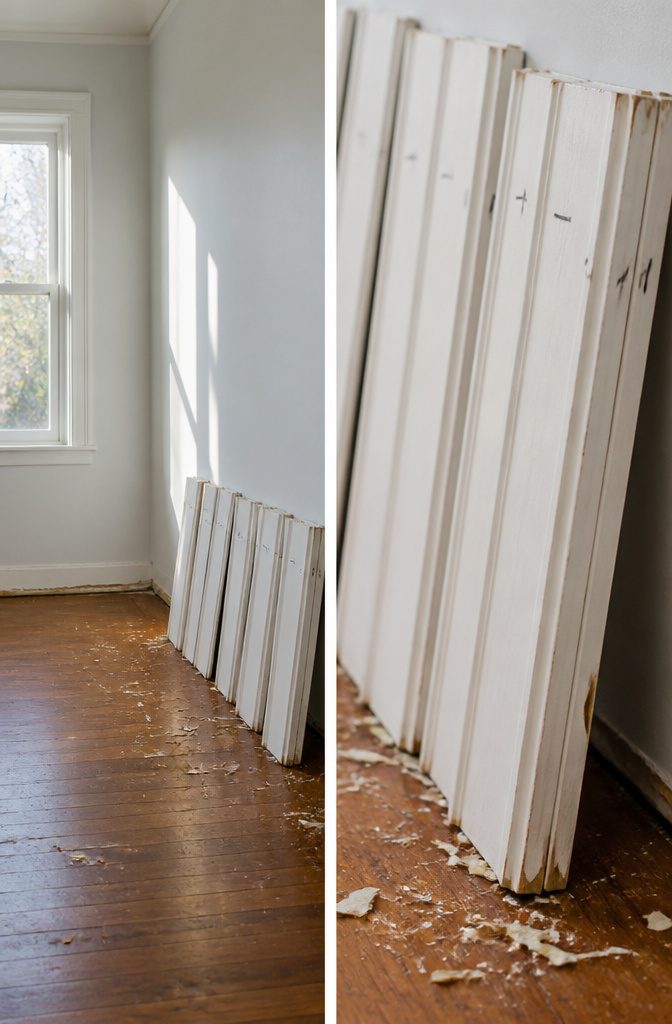
Baseboards have to come off if you want the floor to look like it belongs there, not like it was slipped underneath as an afterthought.
The quarter-inch expansion gap vinyl plank needs around the room would sit there naked otherwise, and shoe molding alone does not hide it well enough.
I scored the caulk and paint where each baseboard met the wall with a utility knife first. Skipping that step is how you pull off strips of drywall paper or chunks of trim.
A putty knife tapped in behind the baseboard with a hammer gave me the first gap, then I slipped in a pry bar and worked my way along.
The putty knife kept the pry bar from digging straight into the plaster.
Number each piece as it comes down, wall by wall. I wrote the room corner and a sequence on the back with a Sharpie.
Kitchen northeast, one through six. It took five extra minutes and saved an hour of guessing which eight-foot piece went where when it was time to put them back.
The baseboards went into the garage stacked in order, face to face so the nails did not gouge the face of the next one.
The pry bar was the tool that actually did the work. The putty knife started things, but the bar had the length and the curve to pop the finish nails without splitting the trim.

For use as a vapor barrier when installing Vinyl, laminate, SPC and engineered wood flooring

Compatible with Luxury Vinyl, Laminate & Engineered Wood – Ideal for LVP, LVT, SPC, WPC, rigid core, and multilayer flooring (4mm+). Supports floating, glue-down, and nail-down installations.
100 sq. ft. Coverage – Ideal for single-room installations and small renovation projects.
Install Underlayment
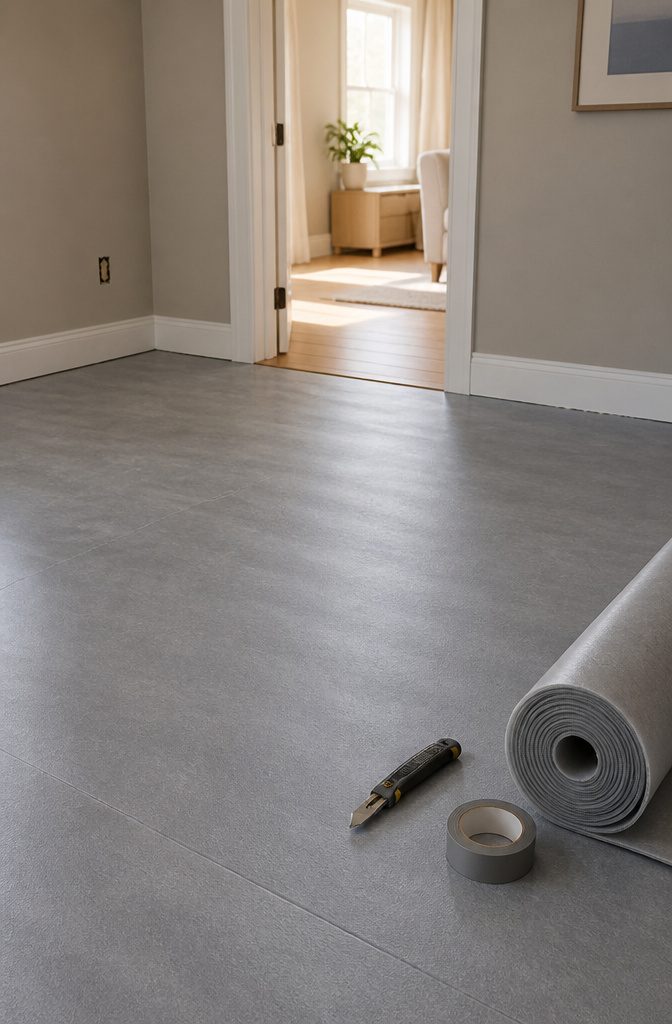
Vinyl planks with a rubberized backing already attached, like Lifeproof, save you this entire step.
The backing dampens sound and adds slight cushion, and adding a second layer can actually void your warranty. Check the underside of your plank before you buy; if it looks bare or foam-free, you need a separate roll.
For bare planks, underlayment acts as a buffer between the floating floor and subfloor.
It adds comfort underfoot, reduces noise, and covers minor imperfections. On concrete, you may also need a moisture barrier to prevent mold and mildew; follow your flooring manufacturer’s guidelines on whether to layer one underneath.
Roll the underlayment from wall to wall, cutting around vents or obstacles with a utility knife. Butt the next strip against the first without overlapping seams, then tape them with underlayment or house wrap tape.
Some manufacturers want adhesive, staples, or tape to secure the sheet; others don’t. I skip the extra fasteners if the flooring instructions don’t demand them, because the planks themselves hold everything in place once laid.
Peel-and-stick vinyl never takes underlayment; the adhesive needs direct contact with the subfloor.

【NAACOO Universal Tapping Block】Close gaps during flooring installation, you just put this portable tapping block on the floor tongue, then tapping it, make the tongue and groove or edges of resilient vinyl planks, laminate or hardwood, Joins flooring planks creating tight seam. Whole process without damaging the floor.

This product adds a great value
Plan the Layout
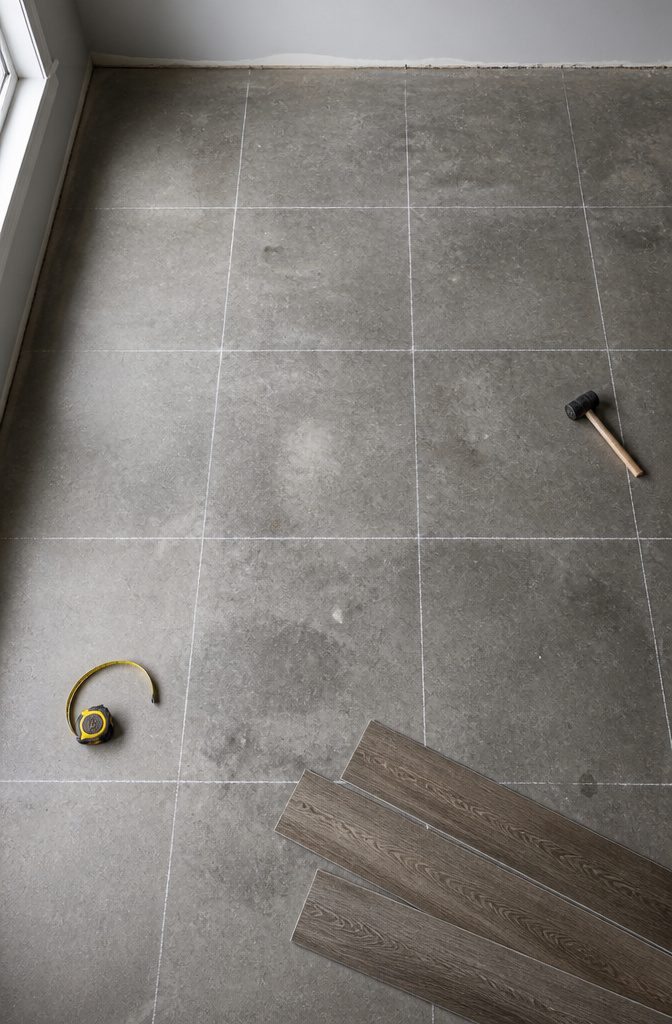
Dividing the room length by the plank width can give a clean-looking number that tempts you to start cutting immediately, but that number only tells you where the last piece lands, not whether that last piece looks right.
Then I checked again and realized the last row would have been under two inches wide, a sliver that would look like a mistake and probably lift at the edges over time.
Plank direction matters more than it looks. I run them the long way of the room when I can; it stretches the space visually and means fewer cuts.
Once you pick that direction, measure the wall perpendicular to it. Divide that number by your plank width.
The decimal left over tells you the last row’s width as a percentage of a full plank. If that math gives you less than two inches, shave the first row narrower so the final row gains that width.
The sources I trust split on exactly where the cutoff should be; some call it half a plank, others a third. I use the two-inch rule because it is easy to remember under pressure and it has never failed me.
After that, snap a chalk line a few sixteenths out from your starting wall, past where the expansion gap will sit.
That line catches any bow in the wall so your first row stays straight even when the wall does not.
Lay the First Row
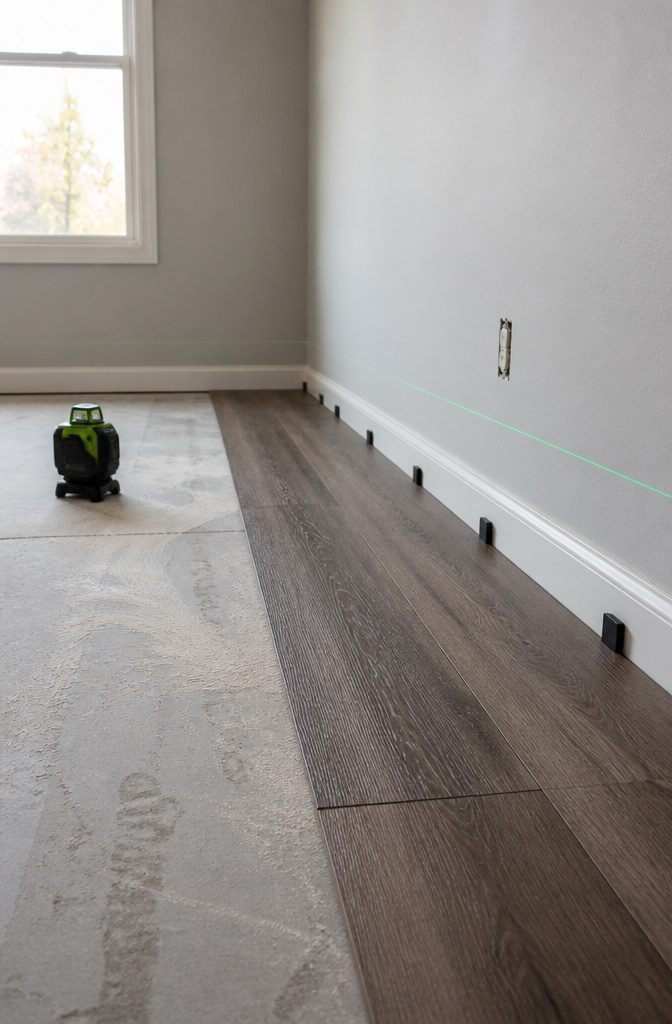
The first plank goes down with its grooved edge facing the wall, not the room, and a 1/4-inch expansion gap against that wall is what saves the whole floor later.
Plastic wedge spacers from the flooring kit, placed every couple of feet, keep the first row from drifting while you work the rest of the wall.
Some people eyeball it with scraps of wood or even the cardboard backing from the planks, but the included spacers are thin enough to leave in place until the baseboards go back on.
That first row is where every row after it gets its straightness.
The tongue-and-groove system will follow whatever line you set here; start crooked and the gap against the wall widens or narrows by the time you reach the far end.
I checked mine with a laser level against the spacers, though a snapped chalk line works the same if the wall itself bows, which most do in older rentals.
The short end of that first plank needs its tongue trimmed flush with a knife so it can sit tight in the corner without forcing the gap open.
Tap the long edge of each new plank into the previous one with a rubber mallet and a tapping block between them; the block keeps the click-lock edge from chipping.
Dead-blow mallets work too, but the rubber ones are what most kits include.
Install Additional Rows
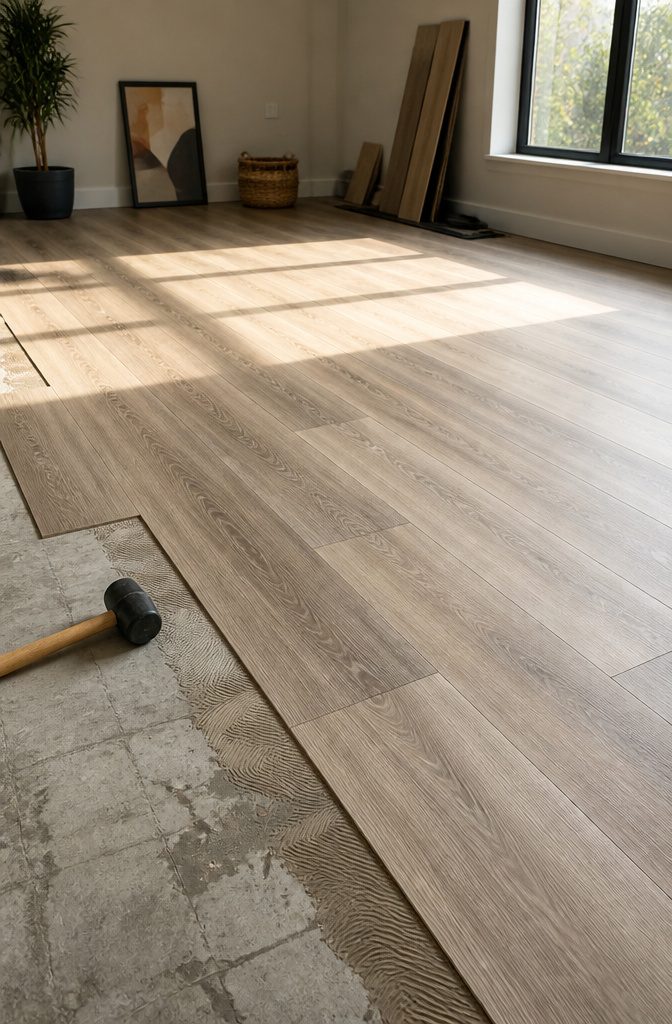
With the first row locked down, the second row starts by cutting that initial plank at least six inches shorter than the one beside it.
I score and snap, or grab the miter saw if the offcut pile already has something close.
Sources vary on exactly how far to stagger; the range lands between six and twelve inches, so I stay inside that window and avoid lining anything up brick-wall tight.
The cutoff from the previous row usually starts the next one, which keeps waste low and the pattern from looking too planned.
Tapping the long seam into the groove of the previous row takes more patience than the videos suggest.
I wiggle the plank down at a shallow angle, seat the short end into its neighbor, then use a dead blow mallet on a scrap piece to knock everything flush.
End pieces near the wall need a pull bar instead; the mallet has no room to swing there, and three tries taught me that lesson slow.

【Ultra-Durable & Pet-Friendly】With a 0.3mm wear layer tested over 15,000 abrasion cycles, this luxury vinyl plank flooring resists scratches, dents, and spills. Ideal for busy homes with pets and kids, it stays beautiful for years even in high-traffic areas.

100% Waterproof Rigid Core Vinyl: Engineered ISOCORE construction ensures full water resistance for kitchens, bathrooms, basements, and laundry areas, with no acclimation required before installation
Reinstall Baseboards
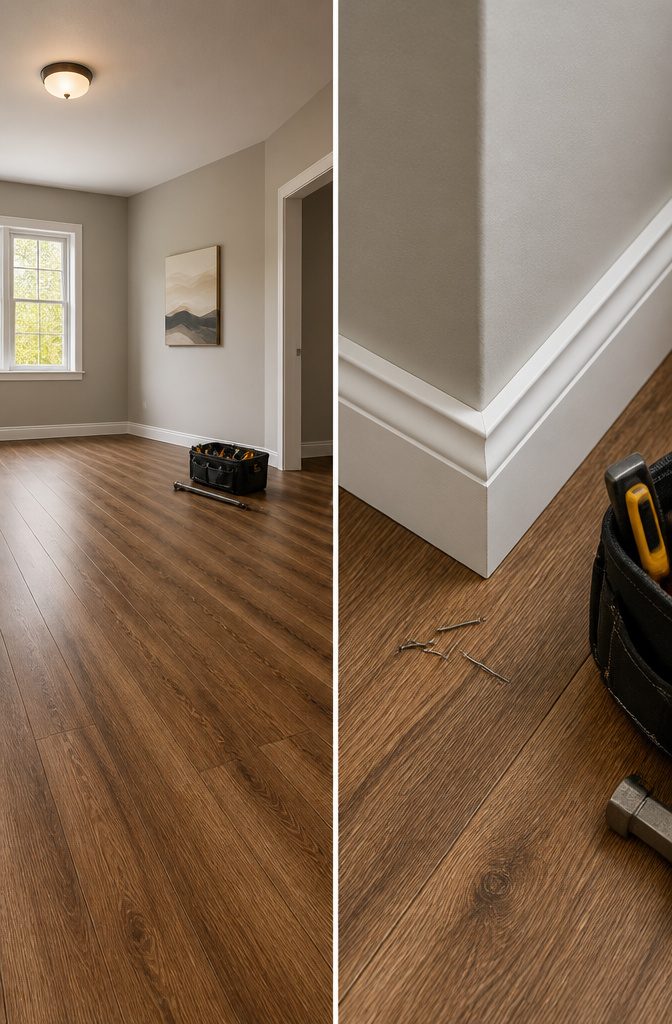
Baseboards hide the quarter-inch expansion gap the planks need, but getting them back on is rarely as simple as tapping in the same nails you pulled.
The floor is now thicker, so the old fasteners often miss the stud entirely and poke through into nothing.
I keep a box of two-and-a-half-inch finishing nails on hand for this exact jump in thickness, and even then I pre-drill to keep the trim from splitting when the nail finally bites.
Some walls are not perfectly straight, and the new flooring height can expose slivers of gap the old baseboards never had to cover.
Quarter round is the usual fix, though it reads as an afterthought next to baseboards sitting flush to the floor. If you are renting or planning to move in a few years, the shoe molding is faster and cheaper.
For a permanent look, taller baseboards or a careful caulk line at the top edge of the old ones keeps the eye from drifting to the gap.
The finished room usually looks tighter than before. The boards sit cleaner against the wall, and the trim carries a little shadow line where it meets the vinyl that painted quarter round never achieves.
Two-and-a-half-inch nails are the detail that saves the reinstall, especially on exterior walls where studs are often deeper set.
Finishing Touches
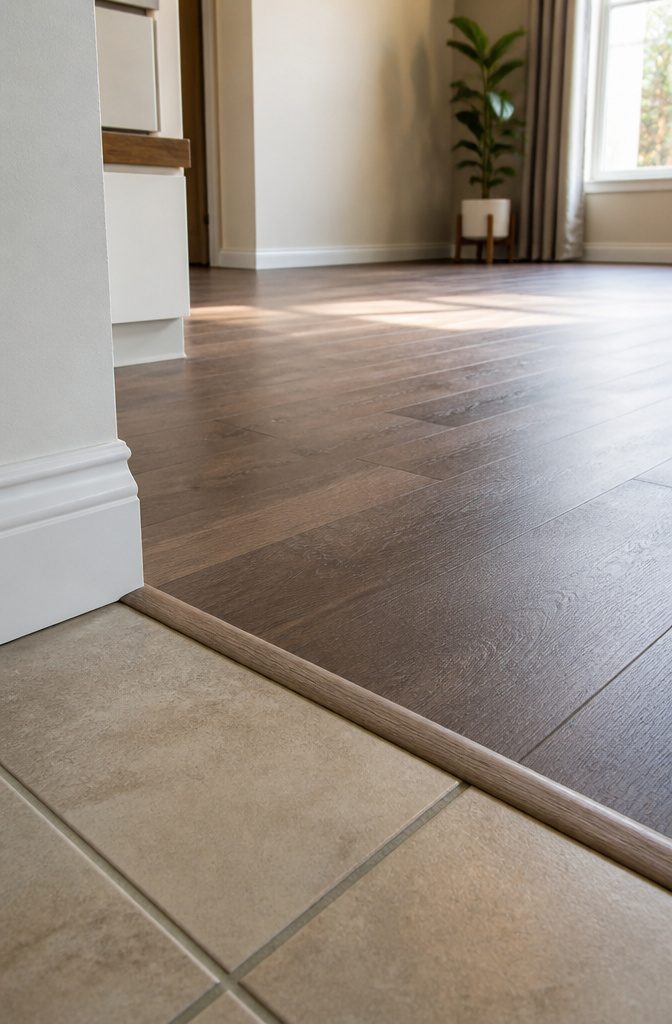
The hallway in my last place had a stubby strip of carpet butting up against the vinyl plank, and the difference in height was just enough to catch a toe every morning.
A T-molding transition strip, siliconed to the subfloor, solved it in ten minutes. The adhesive sets fast, so you get one chance to position it straight.
I also ran a reducer strip between the new plank and an old tile kitchen floor where the tile sat about an eighth of an inch higher.
The sloped profile kept the edge from chipping and made the step feel intentional rather than like a trip hazard.
Everywhere the flooring met a doorway, I checked that the strip sat flush under the closed door.
One bathroom door had clearance tighter than I expected, and planing the bottom edge a fraction would have been smarter than fighting the threshold height after the fact.
The silicone adhesive mentioned for securing strips worked on both types I used, no special fasteners needed.
After the strips were down, I walked the entire perimeter with my weight on my heels near the edges.
Anything that lifted slightly got another press. The floor roller other installers talk about would have helped, but in a weekend project this size, body weight and patience got the same result.
What It Costs
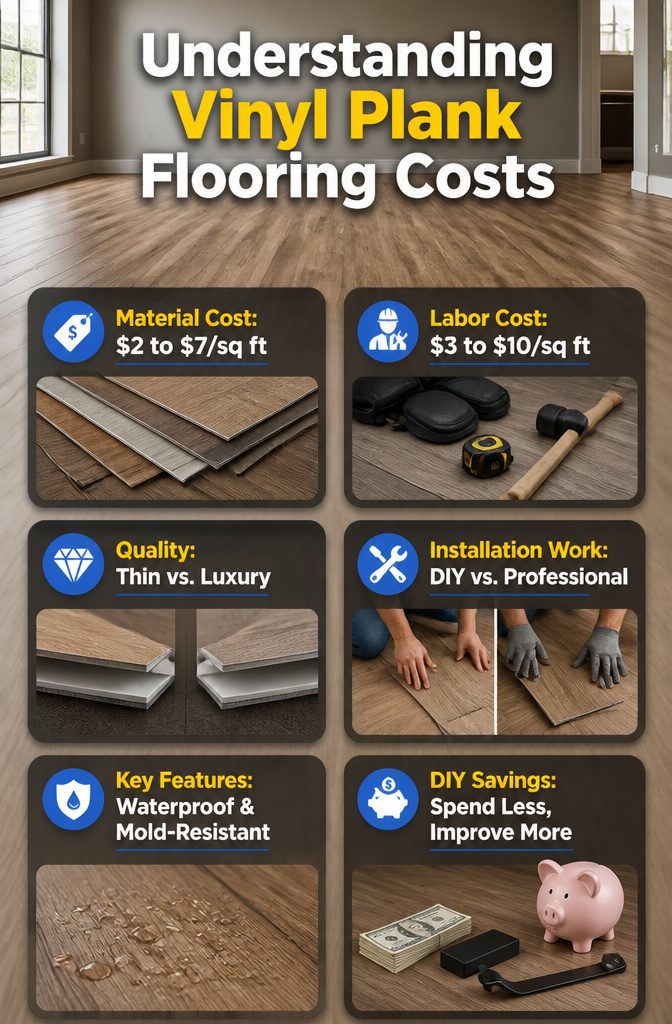
Vinyl plank flooring runs $2 to $7 per square foot for the material itself, and that range tells you most of what you need to know about quality.
The cheaper end gets you thin peel-and-stick planks with 2- to 3-mil wear layers; spend toward $7 and you are looking at waterproof luxury vinyl plank with 12- to 22-mil wear layers, built-in underlayment, and mold-resistant treatments like Lifeproof from The Home Depot.
"When it comes to quality flooring choices, vinyl plank flooring is one of the least expensive to install."
— Bob Vila
That "least expensive" label holds only if you do the work yourself. Hire it out and labor adds another $3 to $10 per square foot, which more than doubles your cost on mid-grade material.
My own 200-square-foot laundry room would have run about $1,400 at the low end of installed pricing; doing it myself, I spent roughly $600 on mid-range planks, a $25 tapping block, and a $40 pull bar I will use again.
The savings went straight into the waterproof underlayment I would have skipped if I had paid for labor, and into replacing a section of subfloor I found rotted near the washer hookup.
That subfloor repair would have cost extra either way, but finding it early let me handle it on a Saturday morning rather than mid-project with a crew on the clock.
Tools That Matter
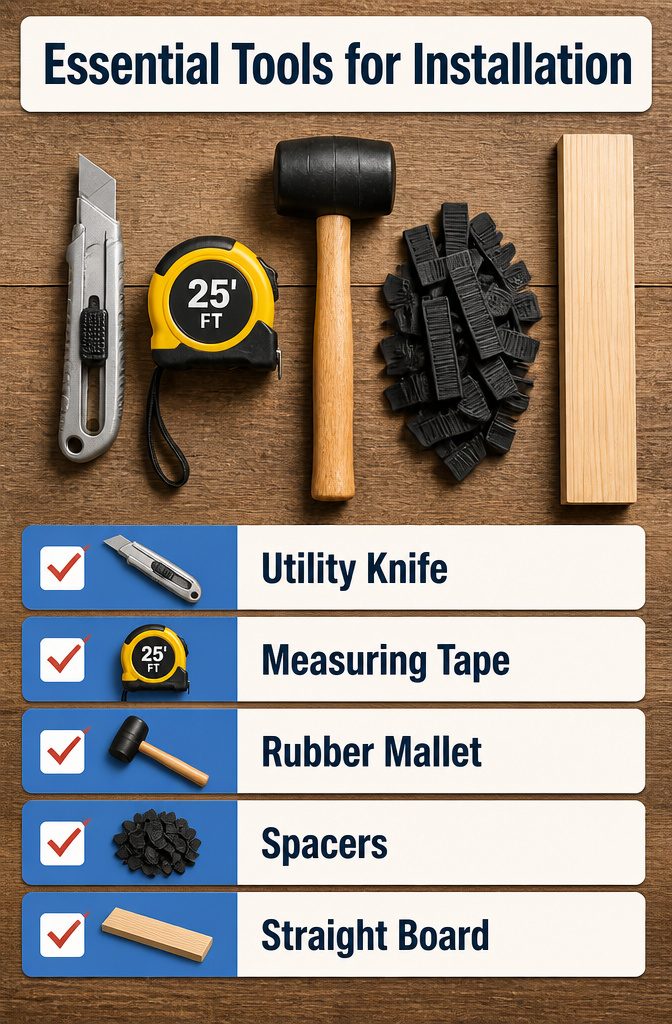
The tools for installing vinyl plank flooring are simpler than most lists make them look. Most of what you need is probably in a basic toolbox already.
- Utility knife — this is the one I reached for constantly. Score the plank, snap it clean. A fresh blade matters more than an expensive knife; swap it the moment it starts dragging instead of cutting.
- Measuring tape — obvious, but the 25-footer I borrowed from my brother’s truck saw more action than the 16-foot one I owned. The extra reach saves you from marking in sections.
- Rubber mallet — for tapping planks into the click-lock joint. Mine was a $9 hardware store find. The dead-blow style the pros mention is nice, but the cheap one worked fine with a tapping block in between.
- Spacers — quarter-inch wedges to keep that expansion gap against the wall. A bag of 50 costs a few dollars, and most will end up under the couch before the job is done.
- A straight 6-foot board you already own may prove truer than the 2-foot level you bought for the job. I returned the level and used the board with a standard level on top for spot checks.
A tapping block and pull bar help for the last rows, though a scrap piece of flooring works as the block if your planks are rigid enough. Knee pads are not optional if you’re over thirty.
Click-Lock, Glue-Down, or Peel-and-Stick
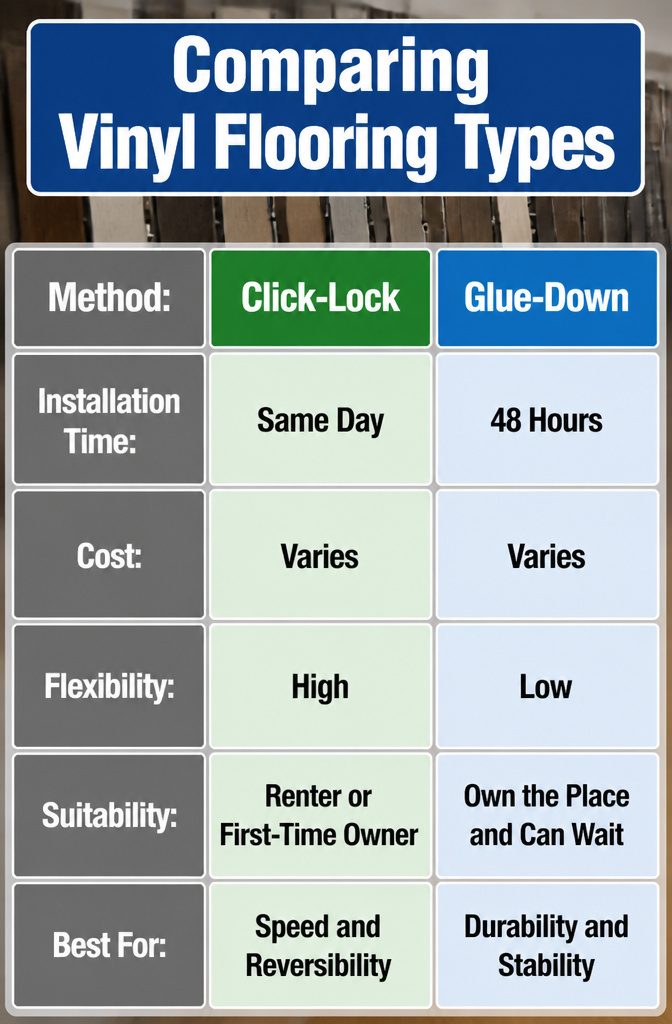
Click-lock vinyl plank flooring snaps together at an angle and drops flat, so you can walk on it the same day you lay it. That speed made it the only method I considered for my own install.
Glue-down planks need at least 48 hours before they take traffic, and the adhesive work adds a full extra day to a project that was already tight for a weekend.
Peel-and-stick removes the drying wait, but the bond is only as good as the floor beneath it; any subfloor flaw telegraphs through, and the adhesive loosens faster in high-traffic spots.
For a renter or a first-time owner working with a few hundred dollars and a Saturday, floating click-lock wins on speed and reversibility.
Floating vinyl rests on top of the old surface rather than becoming part of it, so heavy furniture can pinch if you drag it, and the hollow click underfoot bothers some people.
Glue-down fixes both of those, but only if you own the place and can wait the two days.
Mistakes I Made or Nearly Made
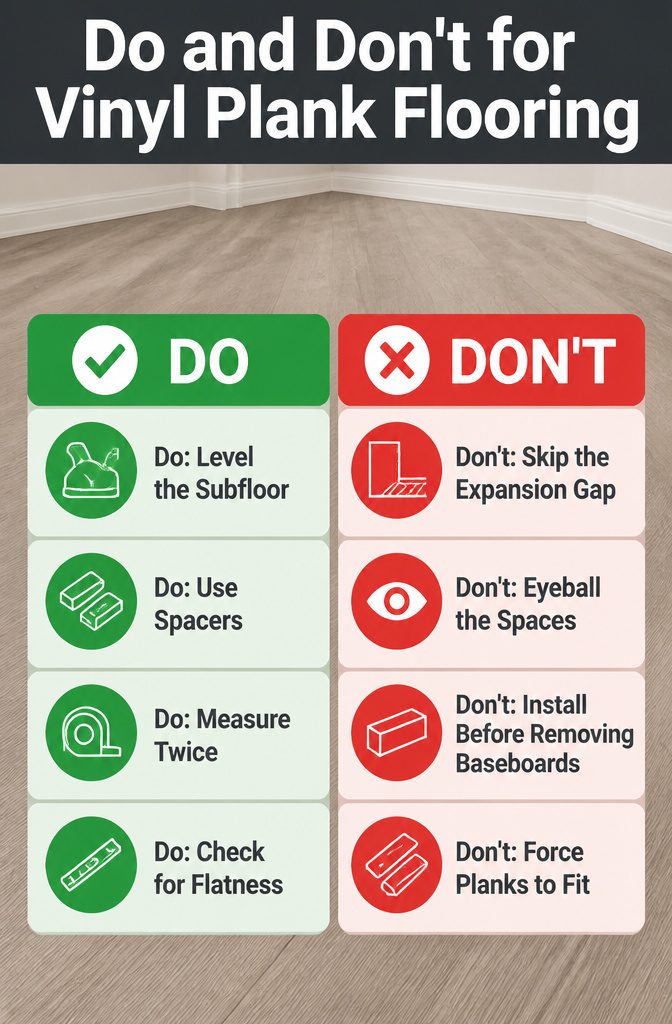
The subfloor in my laundry room looked flat enough to the eye, but three rows into installing vinyl plank flooring I could feel a ridge every time a plank crossed the old plywood seam.
The planks didn’t bounce dramatically, just enough that the lock wouldn’t seat fully along that line. I pulled everything back, rented a floor sander for the afternoon, and feathered the seam down until a straightedge sat flush.
That hour of prep cost me $40 and a Saturday morning; skipping it would have meant hollow spots that telegraphed through for years.
I nearly made a worse mistake with the expansion gap. The manufacturer instructions called for a quarter-inch at every wall, but my baseboards were still in place and I convinced myself I could eyeball the space behind them.
Halfway down the first wall I set the spacers down, measured properly, and realized I’d been leaving closer to an eighth.
A too-tight perimeter leaves the floor nowhere to go when summer humidity hits, and buckled planks aren’t a fix you make on a weekend.
I restarted that row with actual spacers, not guesses, and the rest of the room went faster for having a real reference.
How Long It Takes
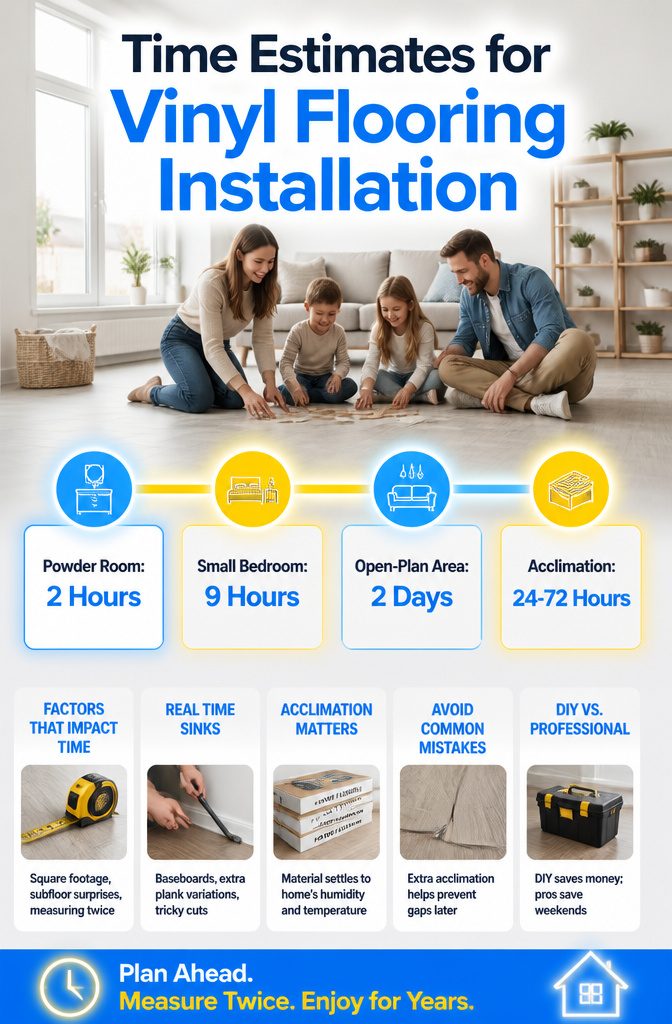
Vinyl plank flooring can run anywhere from two hours in a powder room to a full two days for a whole open-plan living area.
The gap comes down to square footage, whether you hit a subfloor surprise, and how many times you measure twice instead of trusting your eyes.
My own hallway and small bedroom, about 240 square feet total, chewed through nine hours across a Saturday and Sunday morning.
The videos made the click-lock look like snapping together LEGO bricks in twenty minutes, but they never linger on the real time sinks: prying up baseboards without splitting the old shoe molding, running back to the box for a third color variation so the planks look random, and the forty-five minutes spent on one stubborn door jamb cut that the tutorial skipped with a hard cut to black.
Acclimation sits outside those hours entirely. Two days to two days, the material needs to sit in the room first so it settles into the home’s humidity and temperature.
Product boxes usually say twenty-four to forty-eight hours, but I gave mine seventy-two after reading box after box.
The extra day cost nothing but patience and saved me from the gaps that open up when planks swell or shrink after they are locked in.
Frequently Asked Questions
How long does it take to install vinyl plank flooring?
It can take anywhere from two hours in a small powder room to a full two days for an open-plan living area, depending on square footage and whether you hit subfloor surprises.
My own 240-square-foot hallway and bedroom took nine hours across a weekend. That does not include the 48 to 72 hours of acclimation time the planks need sitting in the room before you start cutting.
Do I need to remove old flooring before installing vinyl plank?
Vinyl plank flooring can often go down directly on top of previous vinyl, concrete, or smooth plywood as a floating floor.
The real issue is what lies underneath: bumps, seams, or raised fasteners will telegraph straight through the new planks. Pull everything up, vacuum with a shop vac, and check with a six-foot level before you start.
What is the average cost to install vinyl plank flooring?
The material itself runs $2 to $7 per square foot.
Budget options are thin peel-and-stick planks with 2- to 3-mil wear layers; at the high end you get waterproof luxury vinyl plank with 12- to 22-mil wear layers, built-in underlayment, and mold-resistant treatments.
Hire out the labor and you will pay another $3 to $10 per square foot on top of that.
Do I need underlayment for vinyl plank flooring?
If your planks already have rubberized backing attached, like Lifeproof, skip the extra layer; adding one can void your warranty. For bare planks, underlayment adds comfort, reduces noise, and covers minor subfloor flaws.
On concrete you may also need a moisture barrier to prevent mold. Peel-and-stick vinyl never takes underlayment because the adhesive needs direct contact with the subfloor.
Can a beginner install vinyl flooring?
Yes.
Vinyl plank flooring is one of the easiest floors for a first-timer, especially the floating click-lock variety. The tools are basic, the cuts score and snap clean, and you can walk on the finished floor the same day.
The mistakes that trip people up are almost always prep related: skipping acclimation, skimping on subfloor leveling, or eyeballing the expansion gap instead of using real spacers.
What is the correct way to lay vinyl plank flooring?
Run the planks the long direction of the room when you can; it stretches the space visually and means fewer cuts.
Snap a chalk line a few sixteenths out from your starting wall to catch any bow, then lay the first row with its grooved edge facing the wall and a quarter-inch expansion gap held by spacers.
Stagger the end joints by at least six inches between rows, and tap each plank into place with a rubber mallet and tapping block.
What are common mistakes when installing vinyl plank flooring?
Skipping acclimation leaves gaps that open with the seasons.
Trusting your eye instead of a level lets subfloor ridges prevent planks from locking fully. Eyeballing the expansion gap instead of using spacers risks buckling when humidity rises.
Failing to number baseboards as you remove them turns reinstallation into a guessing game. And forgetting that the new floor thickness changes where your nails bite can leave trim floating on empty air.
What do you lay down before vinyl plank flooring?
Start with a clean, flat subfloor: sweep, vacuum, pull or sink any proud fasteners, and fill dips with patching compound. On bare planks without attached backing, roll out underlayment wall to wall and tape the seams.
On concrete, you may need a moisture barrier underneath that. For click-lock floating floors, that is all; the planks themselves hold everything in place once laid.